Digital technologies/3D printing/3D modeling- Beginner/Design for 3D Printing
It is very important, while designing, to be aware of the limitations of the manufacturing method which will be used to make your design reality. Since this article focuses on 3D modeling for 3D printing, this section will only focus on those considerations relating to 3D printing. If you are unsure how 3D printing works, it is imperative that you read through the Beginner 3D Printing page on this wiki for you to understand the concepts and considerations discussed below.

Supports
As explained in the 3D printing page, supports are sometimes required to support overhanging sections of a print. Due to the downsides of supports discussed below, it is typically better to avoid supports altogether when designing for 3D printing.
Form and surface roughness
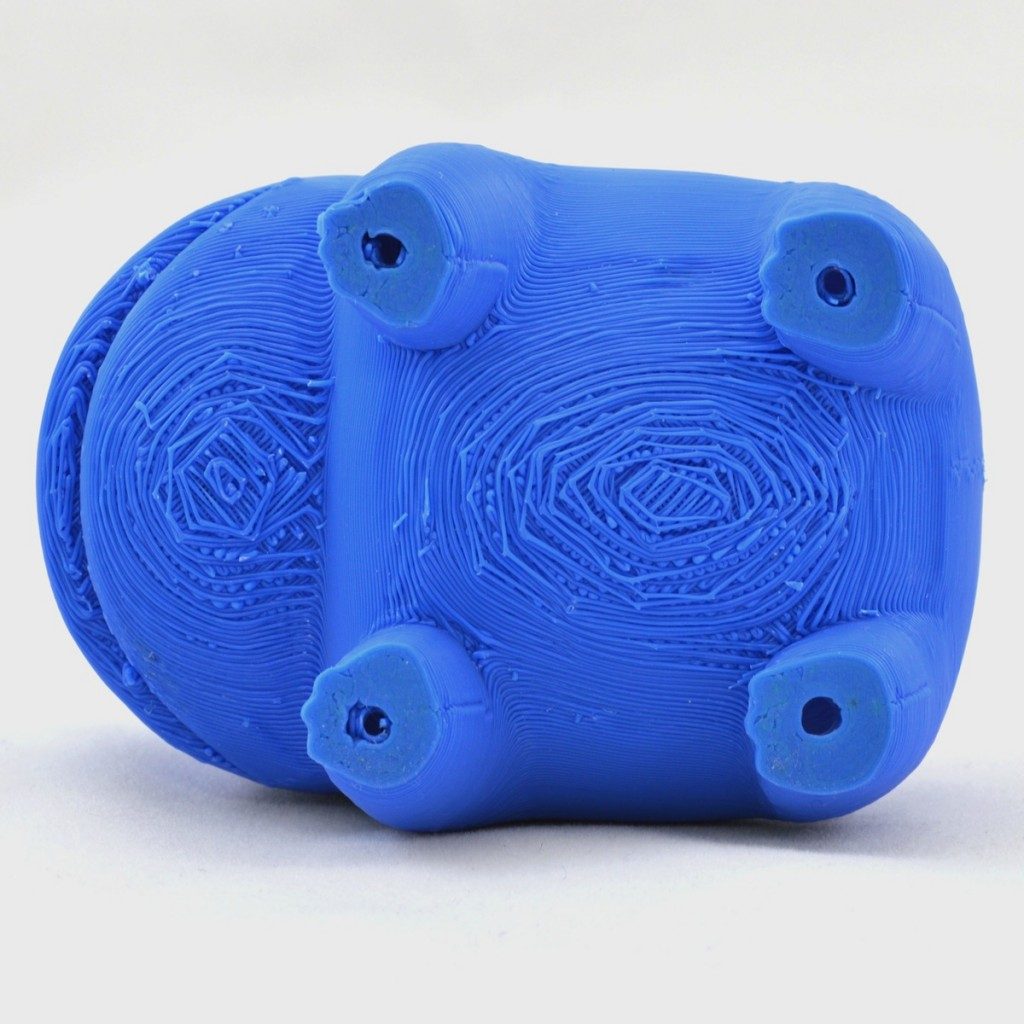
Supports will also require post processing such as removal and sanding (if a nice smooth finish is desired). When designing for mechanical assemblies, it is important to keep in mind that supported sections might sometimes sag slightly, affecting the form of the surface being printed. Therefore, when designing (modeling), make sure that interfacing geometries (those for which the correctness of the shape, or form, is critical as it is interfacing with other parts) are not overhanging.
Hard to access supports
Support removal should always be an important consideration whenever using them. Unless of course you are fine leaving your supports in your print (in which case you might as well enclose that volume and have it be an infilled volume), you will have to remove your supports at some point, and such, you should have them be easily accessible with at the very least some snub nose pliers. While soluble supports are an option, they are practically never used in our Makerspace for prints unless the surface finish and form of the print over a support is critical. While soluble supports are cool and all, most designs can avoid containing supports that are hard or impossible to reach.

Build plate adhesion
When printing, adhesion is one of the main considerations. Make sure your design contains an adequate flat section that, if used as a base for the print, will not lead to excessive overhangs. The Thingiverse hand is a bad example the way it is positioned in Importing Models section of this article, but the way the flat section of the wrist is designed, and considering the position of the fingers not significantly overhanging (perhaps the pinkie is slightly overhanging), placed on the its flat wrist section, this hand model is expected to print properly without the use of extra adhesion features, or even supports!
Large prints
Extremely large prints cannot fit your regular build plate (or build volume). Yes, the makerspace does own 3D printers with larger build volumes, but those using them are typically charged for machine time. Instead, it can be extremely easy to split larger prints into smaller sections, and to then adhere these components together once they are all printed. The result might even look better, as sectioned parts can be oriented on the build plate to reduce the use of supports or improve adhesion.
- ↑ Simplify3D (2022). Poor Surface Above Supports. Accessed on 05-05-2022 at https://www.simplify3d.com/support/print-quality-troubleshooting/poor-surface-above-supports/