Digital technologies/Laser cutting/Vector graphics- Beginner/Useful tools
Multiple Selections and Grouping
Sometimes you may need to move or change multiple objects at once, this is where multiple selections may be useful. To select multiple objects simultaneously you may either hold shift while clicking your desired objects, or hold down left click to drag a selection box around all your desired objects (This is called rubber band selection). If multiple objects are selected at once, any transformations, scaling, or rotation will affect them all simultaneously.
If you find yourself needing to frequently edit the same set of objects, or you’re happy with the placement of a set of objects in relation to one another, it may be useful to combine them into a group. Once combined into a group, the set of objects will behave as a single object once selected. To create a group, select multiple objects and press Ctrl+G or Object>Group.
If you wish to ungroup you may select the group and press Ctrl+U or Object>Ungroup. If you wish to edit an object within a group, you do not have to ungroup, you can simply Ctrl+Left-Click or double click the object.

Fill and Stroke
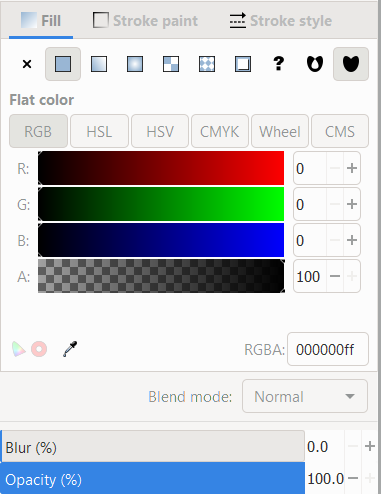
The most important menu for vector design in the context of laser cutting, the Fill and Stroke menu allows you to edit the fill paint, stroke paint, and stroke style of a selected object. To access this menu select Object>Fill and Stroke or simply press Shift+Ctrl+F.
The Fill tab allows you to edit the fill (interior) of the selected object. There are options for no paint, flat paint, as well as various gradients and patterns. You may also select the colour paint through either your choice of RGB, CMYK, HSL, and Wheel colour pickers.
The Stroke paint tab allows you to edit the paint of the stroke (outline) of the object with the same paints and patterns of the Fill tab.
The Stroke style tab allows you to edit the width and pattern of the outline. This is an extremely important menu for laser cutting, for reasons covered later.
Align and Distribute
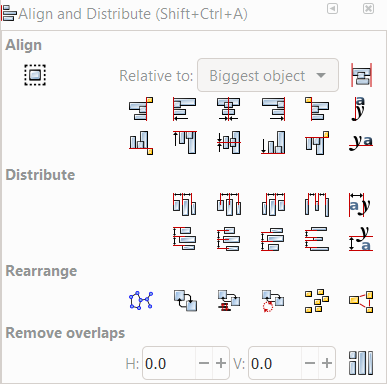
Unless you wish to place your objects completely randomly, chances are you want your objects placed in a way relative to one another (centered, leftmost, topmost, etc…), in which case the Align and Distribute menu may be useful. To access the Align and Distribute menu, go to Object>Align and Distribute or press Shift+Ctrl+A.
After selecting multiple objects, this menu will allow you to align and distribute the multiple objects according to the pattern you set, and relative to the area you defined.
