Digital technologies/Laser cutting/Vector graphics- Beginner/Shapes Toolbar

Creating Shapes
The shapes toolbar can be accessed on the left hand side of your screen. The most commonly used shape tools for laser cutting would be the rectangle, circle, and polygon tools. Each shape you create using the tools will display one or more handles that will either affect the dimensions or shape of the created object (i.e. adding rounded edges to a rectangle, or making a semi-circle).
Moving, Scaling, Rotating, and Skewing
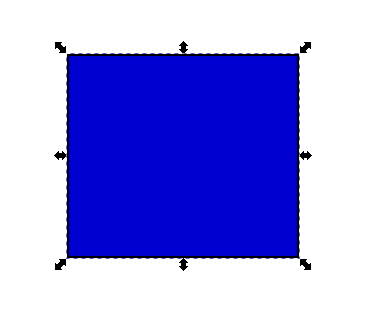
First click and select the desired object until the straight, eight arrow shaped handles appear:

To Move objects, click and select the outline of the desired object and drag it to the desired location. Ensure that you select the outline of the object, as you will not be able to select the "Fill" (interior space) of the object. You can also hold Ctrl to restrict the movement to the horizontal or vertical axis.

To Scale the object, drag any of the handles. You can also hold Ctrl to preserve the original height/width ratio
If you have a precise location or size in mind for your desired object, you may also use the numeric entry fields in the Tool Controls bar to set exact X and Y coordinates for the object's location or exact W and H values for the dimensions of the object. The origin (coordinates 0,0) is located at the top left of the page, and the X/Y coordinates for every object is referenced by the top left corner of the shape.
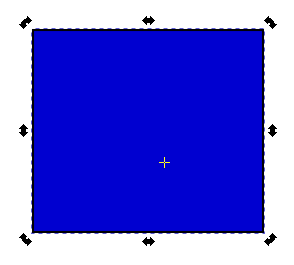
For rotating and skewing, click the object again until you notice the eight arrow shaped handles change in appearance. You’ll notice the corner handles will no longer be straight:

To Rotate the object, drag the corner handles. You can also hold Ctrl to restrict rotation to 15 degree intervals. You may also drag the cross mark to position the center of rotation.
To Skew (shear) the object, drag any of the non-corner handles. You may also hold Ctrl to restrict the skewing to 15 degree intervals.