Digital technologies/Arduino/Arduino- Beginner/Arduino IDE and Tools
Arduino IDE:
The process of programming includes designing and executing code in an integrated development environment, otherwise known as an IDE. Many different IDEs exist and are adopted for different usages, and allow programs to edit, debug, and execute (or compile) their code. In order to program an Arduino (regardless of what kind of microcontroller is used), one must have the Arduino IDE downloaded (Refer to Connecting an Arduino).
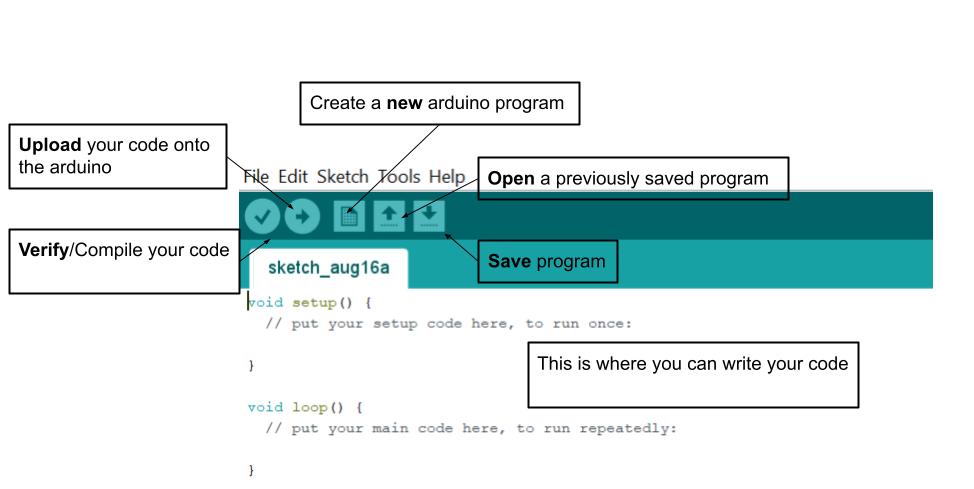
When beginning your journey in learning how to code, its important to get to know the integrated development environment, or IDE that the coder will use to edit and compile the written programs. The following figure guides the users on the basic options available on the IDE:
Internal Libraries
What is a library?
A library is a file that contains pre-written code that can be referred to in order to use certain sensors and functions. Often, in order to complete a task like connecting to a server to spinning a motor many lines of code must be written and executed. Libraries are bits of code that users can refer to in order to complete those tasks without having to type out each line of code, it simplifies the programming process and allows us to perform relatively complex tasks with ease.
In beginner topics we won’t be using complex or external libraries! But keep this in mind for the following ones as this will be necessary later on.
Built-in Libraries
Built-in libraries are ones that come preinstalled into the Arduino IDE, you don’t need to import the library into the IDE. An example of this type of library is the math.h library, which is used for most basic math operations.
Where to find them?
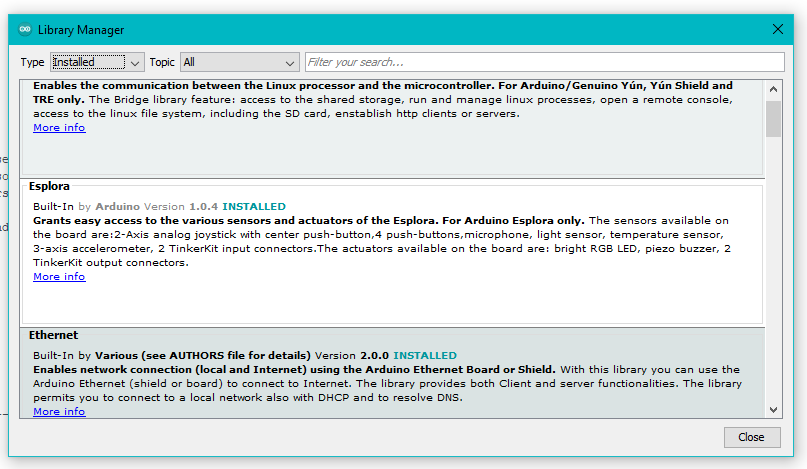
There are a few ways to look at what built-in libraries are available, you can do a quick search in different online Arduino forums, or the easiest way is to look at the library manager in the Arduino IDE. This window displays libraries that are already installed and you also have the ability to install new libraries that would would like.
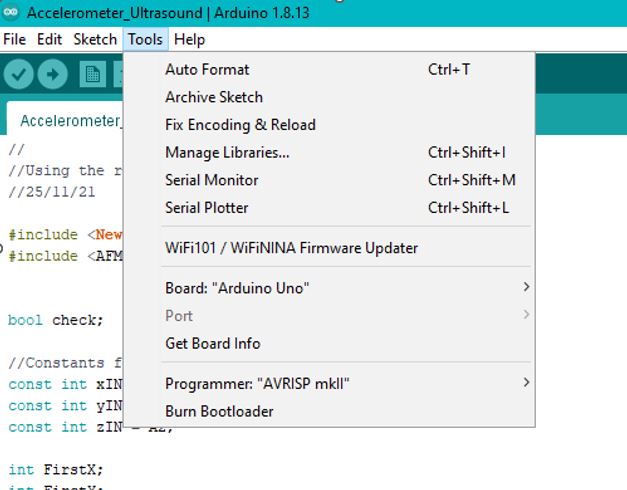
As seen below, in the menu bar at the top of the window click on Tools > Manage Libraries...
Inside the manager as seen below you are able to select the type of library you are looking for, for example, installed, etc.
When wanting to use a library, one must declare it at the top of their code so that their IDE knows that that file is being referred to, the syntax is:
#include<math.h>
Serial Monitors
The serial monitor is a function in the Arduino IDE that allows you to interact with your Arduino. Through it you are able to send information and also receive feedback or the system output, this aids in debugging and interacting with the program.
The serial monitor can be accessed in two locations: the icon in the bar at the top of the IDE, as seen in the figure below.
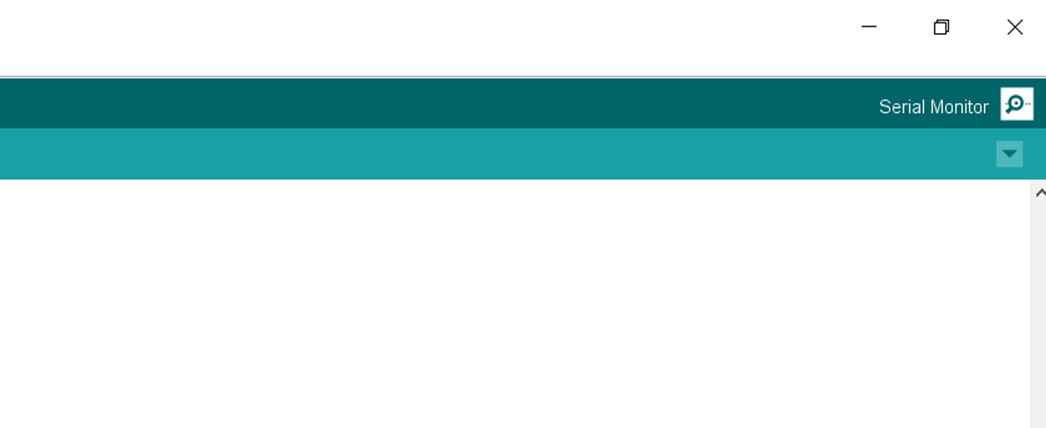
And in the following drop down menu as shown below:
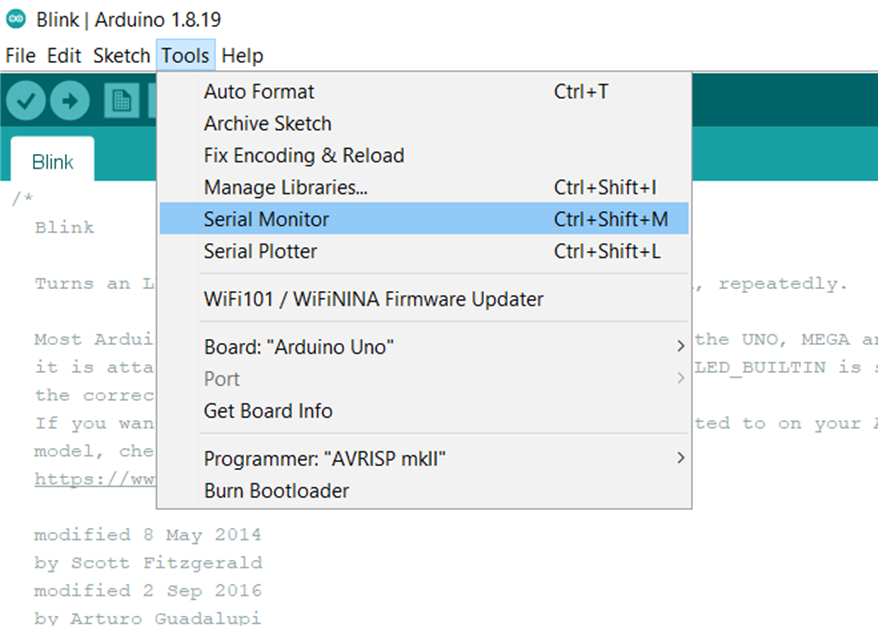
A few features to note is the baud rate and auto scroll functionality. The baud rate must match the one dictated in the program, this value dictates that rate that the Arduino and IDE communicate with each other.
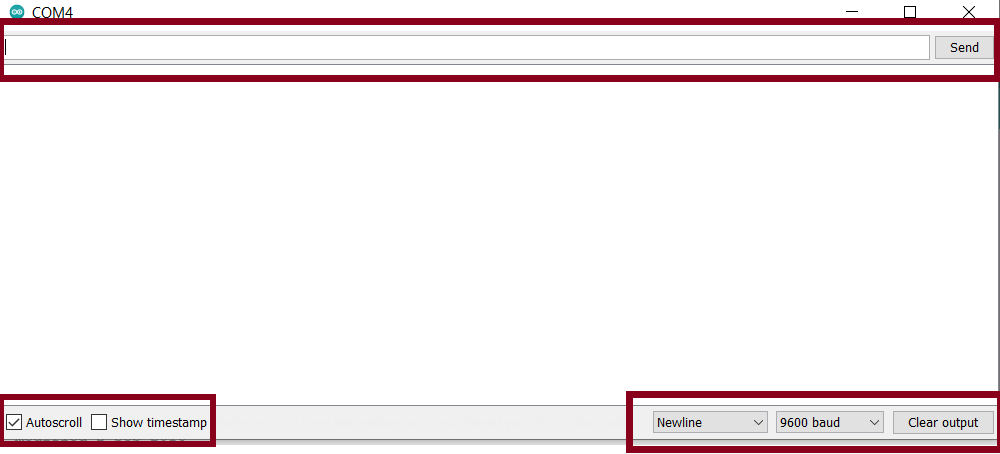
When using the serial monitor it must be initialized in the code for a specific baud rate as follows:
Void Setup {
Serial.begin(9600); //this initializes the monitor at a baud rate of 9600 }
There are a few different ways to output values on to the serial monitor for example when wanting to output the value held by a variable the following syntax can be used:
Serial.print(variable_name):
Serial.println(variable_name); //for outputting each value on a new line
Alternatively, when wanting to output a string or phrase the following syntax can be used:
Serial.print("INSERT PHRASE");
Serial.println("INSERT PHRASE"); //for outputting each value on a new line
