
User:Geo815/Sandbox/Setup PrusaSlicer
The Prusa printers in the Makerspace require the PrusaSlicer software to prepare their prints. This guide will explain the steps to set up the PrusaSlicer software for use in the Makerspace. Before proceeding, make sure to download and install PrusaSlicer from https://www.prusa3d.com/p/prusaslicer/, following the instructions for your operating system.
Initial Setup
- Open the PrusaSlicer app
- If an SSL certificate store prompt appears, select "Yes".
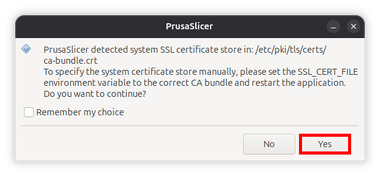
SSL certificate store prompt - The Configuration Wizard will open. Select "Next" three times, without changing the options on the screens. The slicer will download the latest configuration profiles.
- Once the download completes, a list of printers will be displayed. Select the following printers (you may need to scroll through the list):
- Prusa CORE One & One+ (Gen 2) - HF0.4 mm nozzle
- Original Prusa XL - 2T Input Shaper - 0.4 mm nozzle
- Original Prusa MK4S - HF0.4 mm nozzle
- Select "Finish"

-
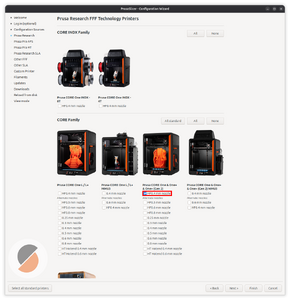 Printer list with CORE One+ printer selected
-
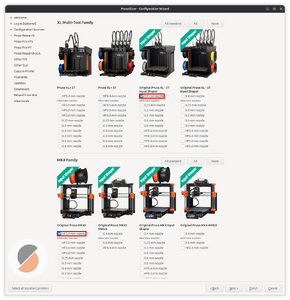 Printer list with XL and MK4S printers selected


Per-print setup
- Select your printer type on the right hand side of the slicer
- For Makerspace printers starting with "C1P", select "Prusa CORE One HF0.4 nozzle"
- For Makerspace printers starting with "MK4S", select "Original Prusa MK4S HF0.4 nozzle"
- For Makerspace printers starting with "XL", select "Original Prusa XL - 2T Input Shaper 0.4 nozzle"
- Select the filament type(s) on the right hand side of the slicer. In most cases, this will be "Generic PLA"
- Import your model(s) by pressing the "Add..." button (the solid cube icon at the top of the slicer)
- Position/edit your models as needed using the tools available in the slicer. One important tool is the "Arrange" tool, available at the top of the slicer or by pressing "A"
- Set your slicer settings as desired, using the settings on the right and the "Print Settings" tab at the top of the slicer
- Select the "Slice now" button to slice your print
- Inspect your sliced print. If you need to make changes to the positioning of objects, select the solid cube in the bottom left corner of the slicer to return to the editor view
- Connect the printer USB drive to your computer
- Select the orange USB icon next to "Export G-code" to save your sliced model to the USB drive
