Difference between revisions of "Tutorial: Creating Unity Assets with SOLIDWORKS"
| Line 1: | Line 1: | ||
==Exporting SOLIDWORKS Assemblies== | ==Exporting SOLIDWORKS Assemblies== | ||
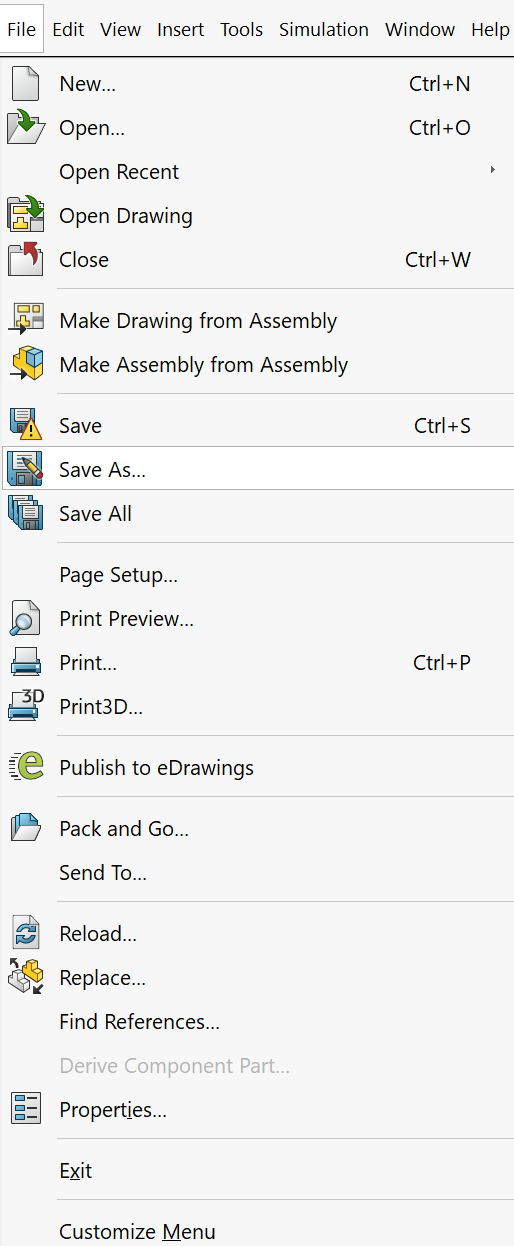
| − | With SOLIDWORKS, open an assembly file. Under ''File'', select ''Save As'' and under ''Save as type'', select .STL. Afterwards, press the ''Options'' button, and make sure that the option ''Save all components of an assembly in a single file'' is unchecked. You should now have a .STL file for each assembly part. Place all the .STL files into a single folder. | + | With SOLIDWORKS, open an assembly file. Under ''File'', select ''Save As'' and under ''Save as type'', select .STL. |
| − | [[File:Screenshot (8).png|thumb|The SOLIDWORKS ''options'' menu to convert all of an assembly's components to .STL files. ]] | + | [[File:Screenshot (7).png|center|thumb|364x364px|The ''File'' dropdown menu of SOLIDWORKS.]] |
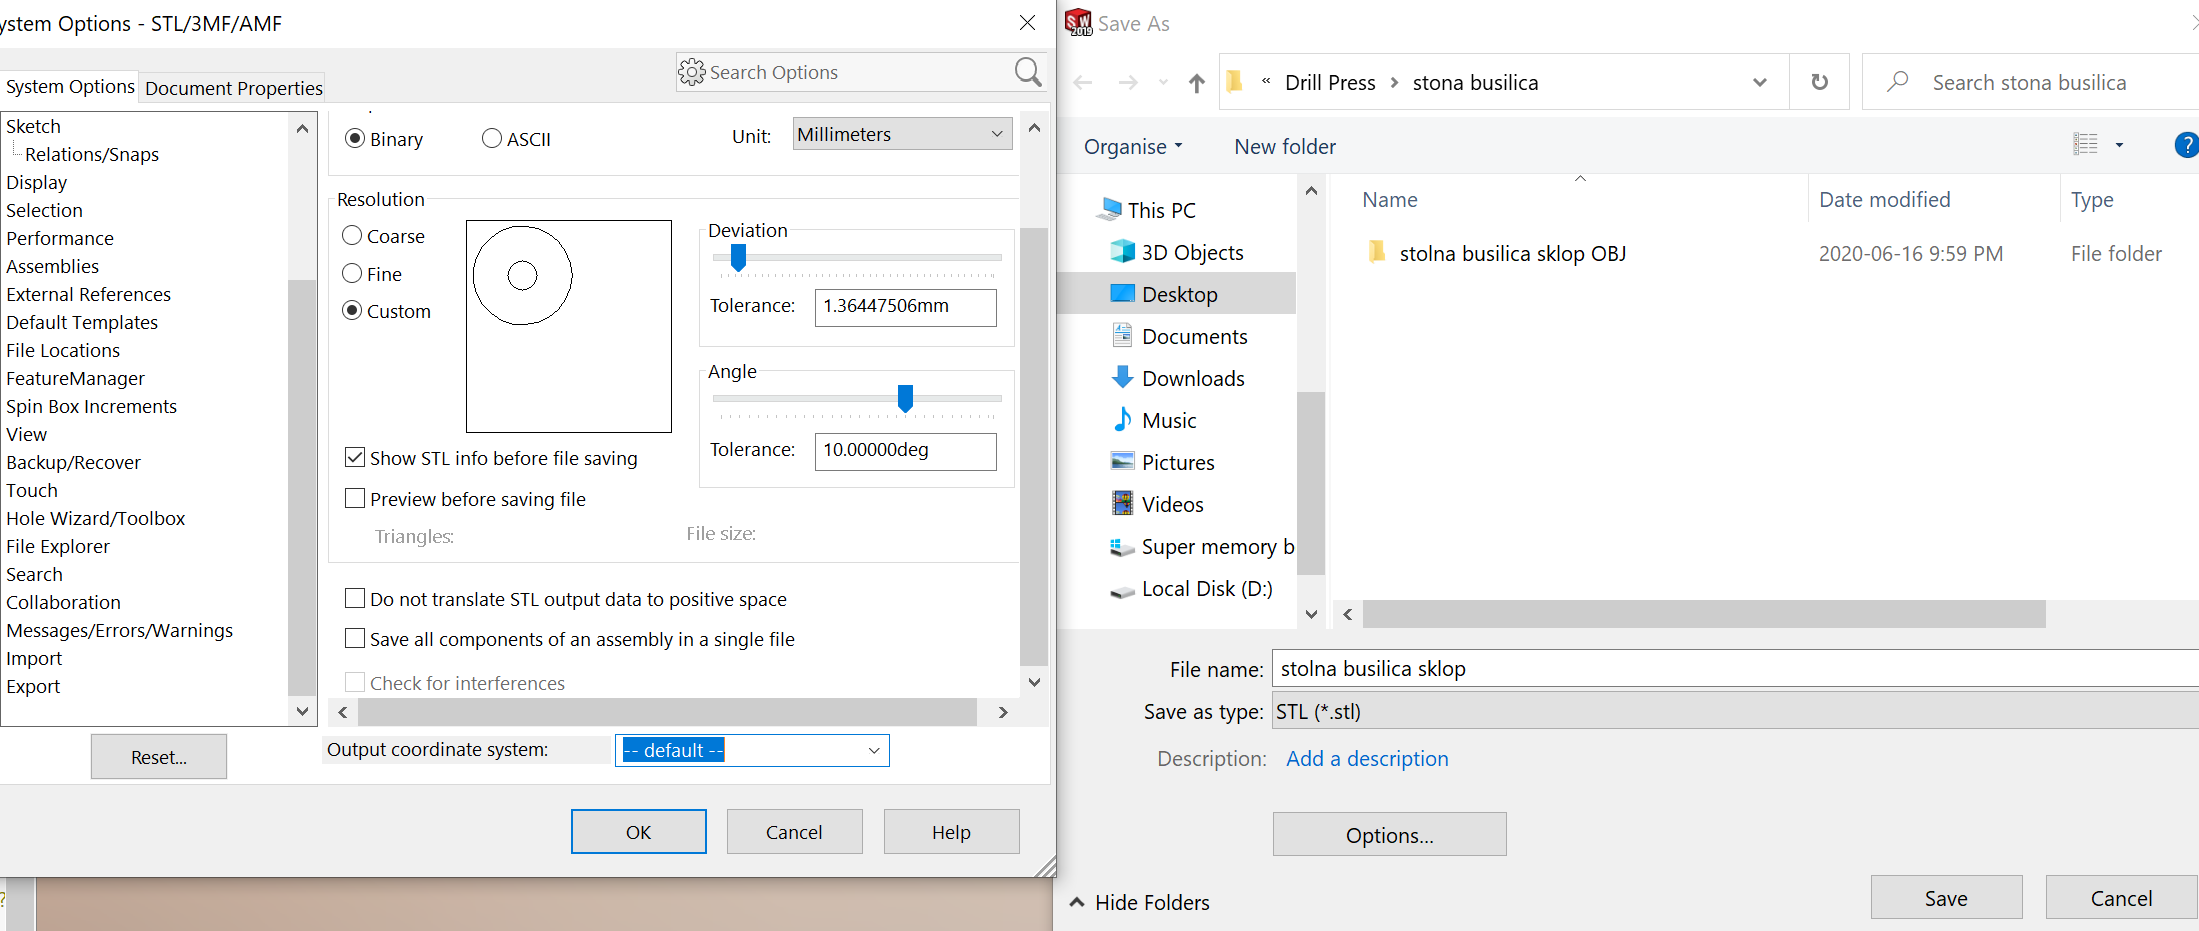
| + | Afterwards, press the ''Options'' button, and make sure that the option ''Save all components of an assembly in a single file'' is unchecked. You should now have a .STL file for each assembly part. Place all the .STL files into a single folder. | ||
| + | <br />[[File:Screenshot (8).png|thumb|The SOLIDWORKS ''options'' menu to convert all of an assembly's components to .STL files. |alt=|center]] | ||
==Importing .STL files into Blender== | ==Importing .STL files into Blender== | ||
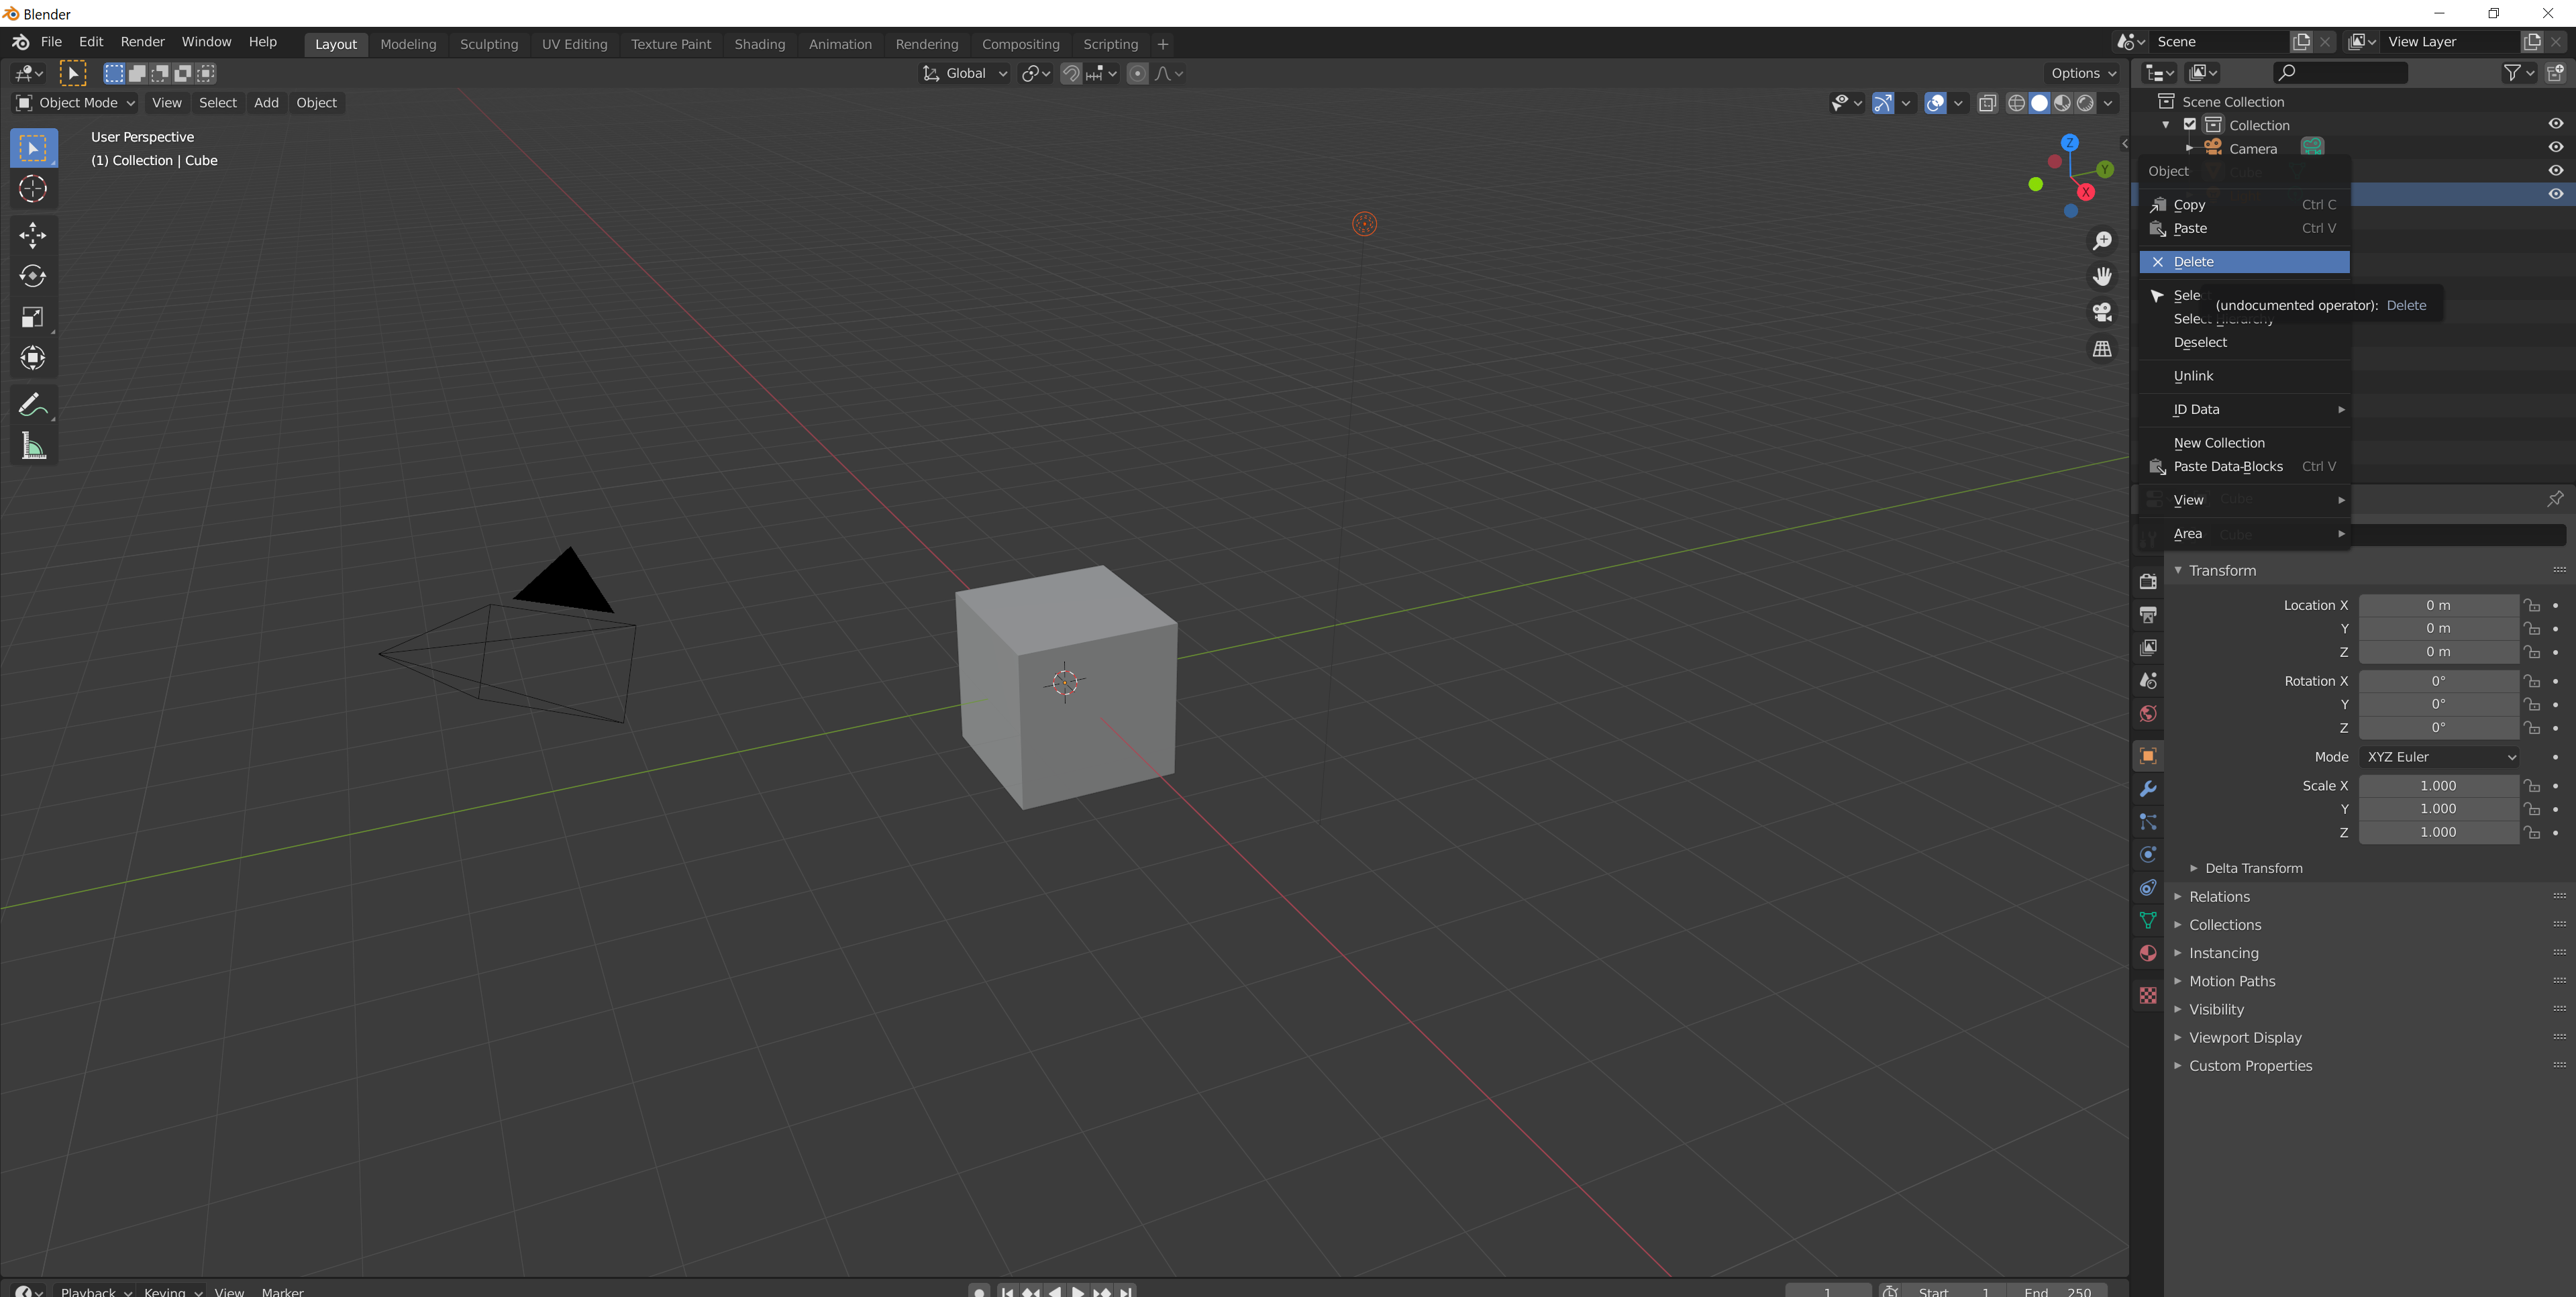
| − | Open Blender, and delete the ''Camera, Cube,'' and ''Light'' on the right-hand side of the page by right-clicking on them, and pressing ''Delete''. Now, from the top left corner, press ''File, Import'' and ''Stl''. Navigate towards the folder that contains your .STL files. Once in the folder, CTRL + left-click all the .STL files, and finally click on ''Import STL.'' Once imported, the assembly will no longer have the textures or material appearances that were assigned to it in SOLIDWORKS. However, it is possible to assign new colors and/or textures to all the imported components using Blender. | + | Open Blender, and delete the ''Camera, Cube,'' and ''Light'' on the right-hand side of the page by right-clicking on them, and pressing ''Delete''. |
| + | [[File:Screenshot (9).png|center|thumb|Deleting the default ''Light'' item in Blender. ]] | ||
| + | |||
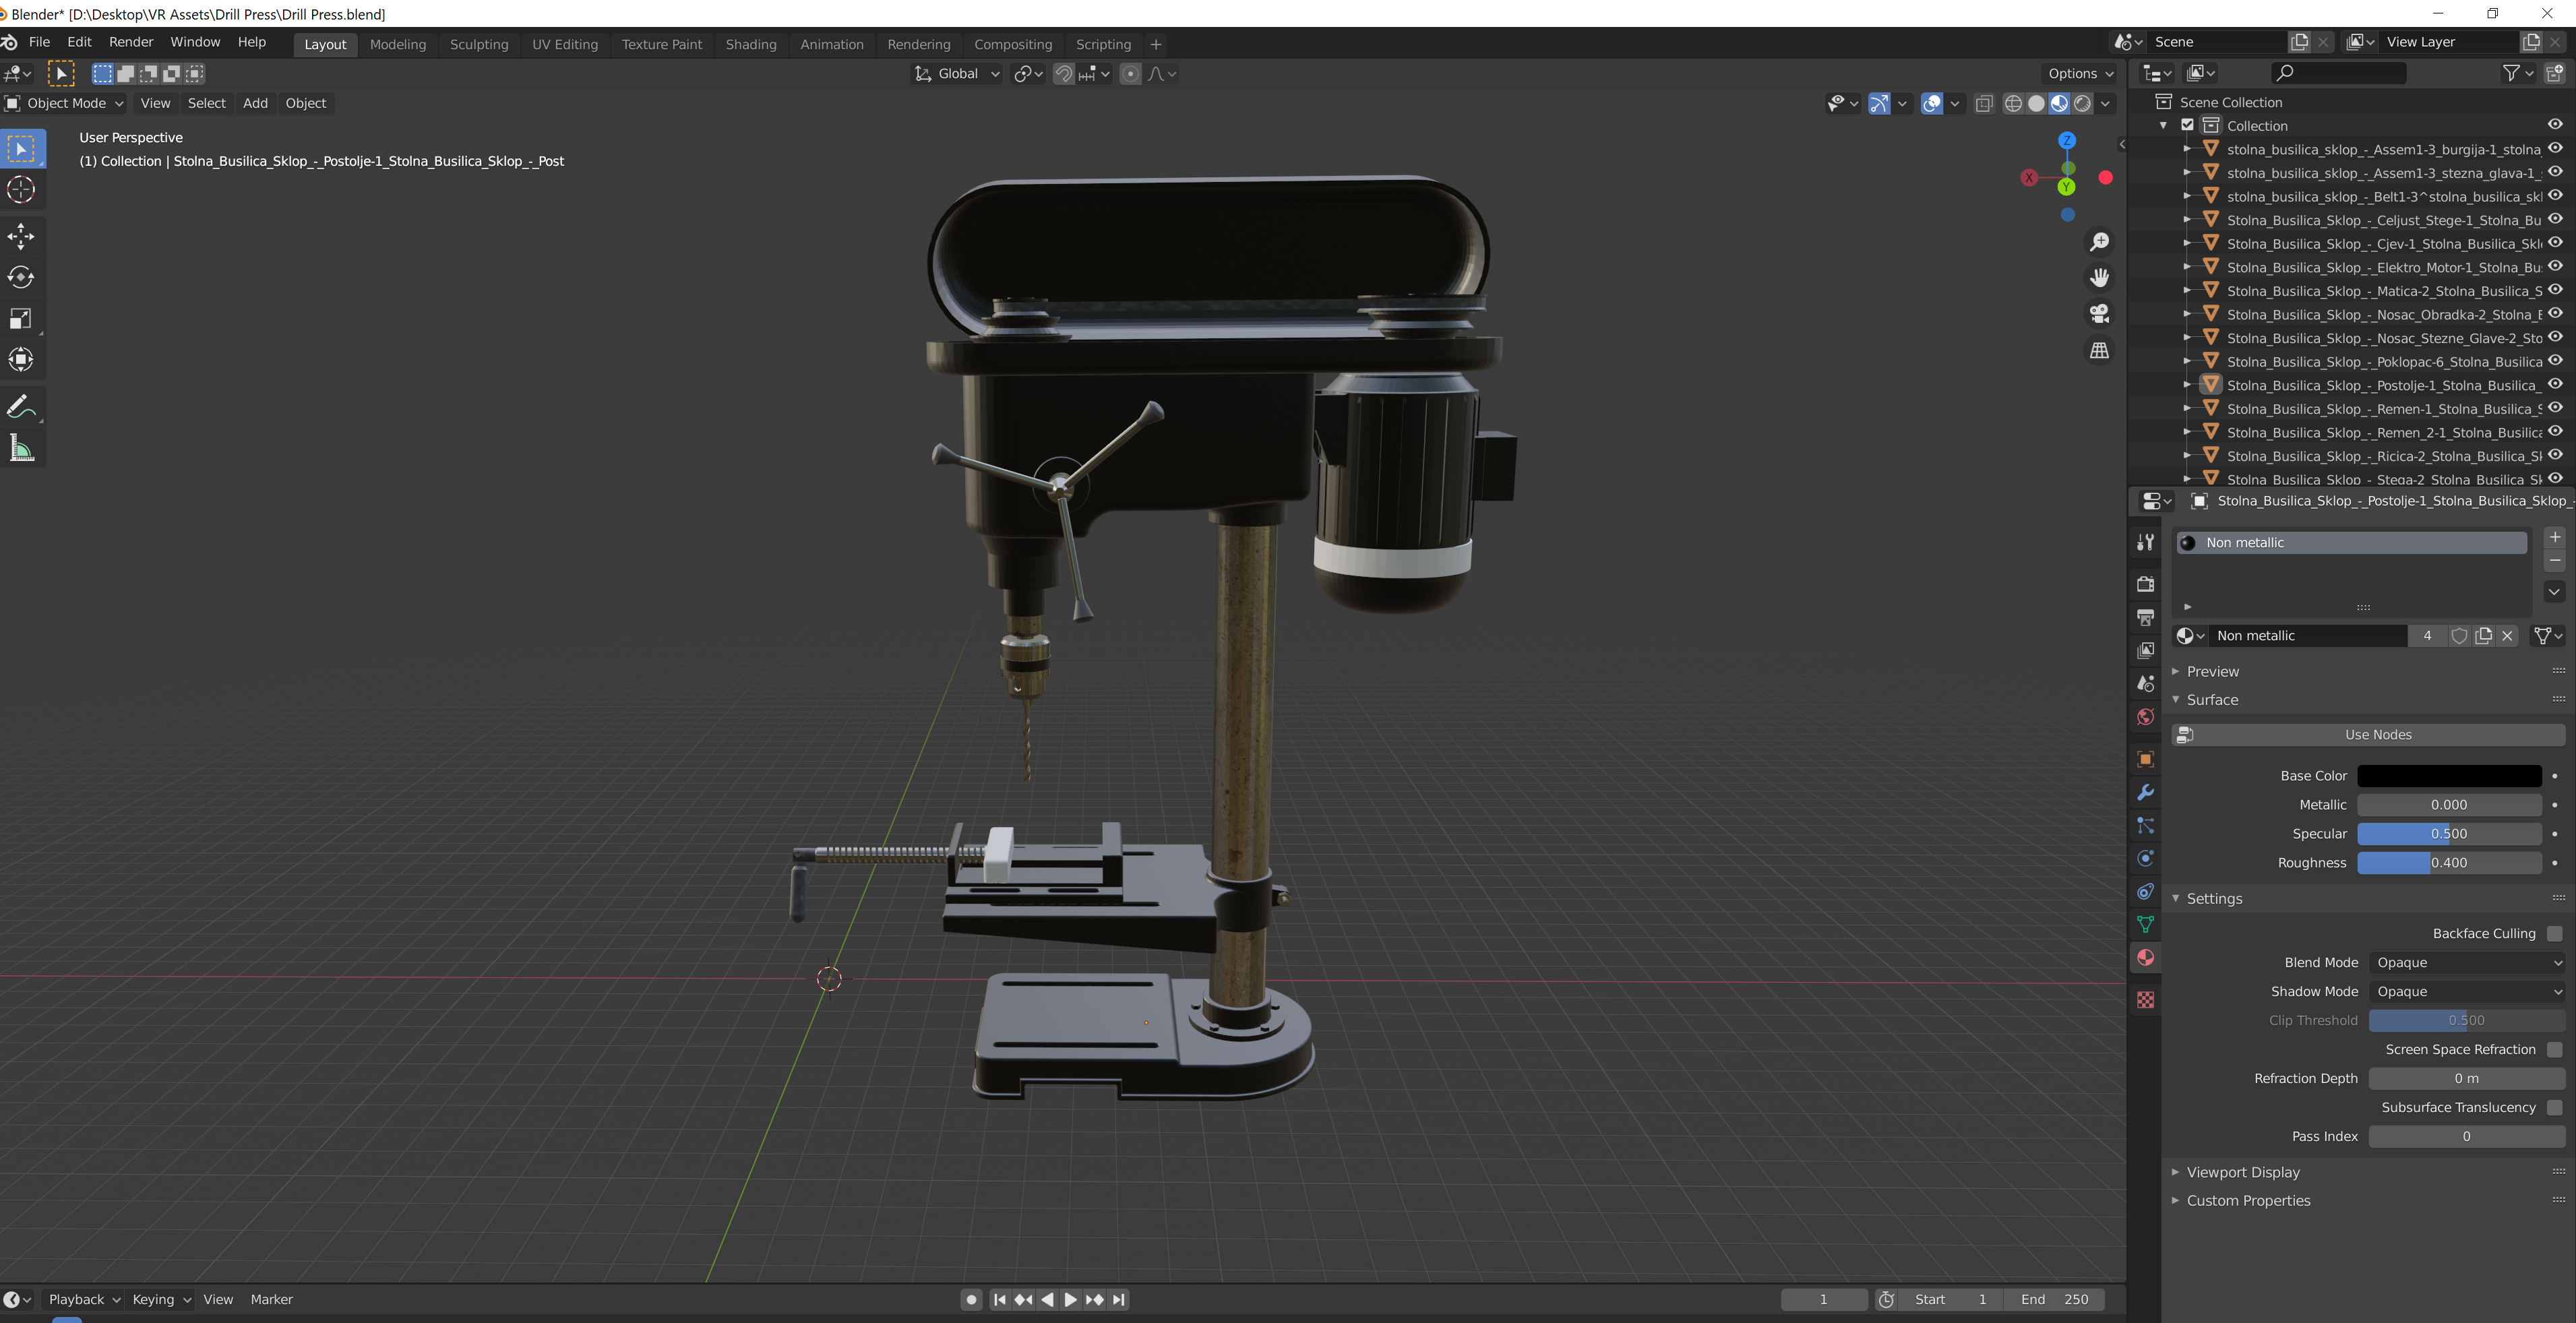
| + | Now, from the top left corner, press ''File, Import'' and ''Stl''. Navigate towards the folder that contains your .STL files. Once in the folder, CTRL + left-click all the .STL files, and finally click on ''Import STL.'' Once imported, the assembly will no longer have the textures or material appearances that were assigned to it in SOLIDWORKS. However, it is possible to assign new colors and/or textures to all the imported components using Blender. | ||
| + | [[File:Screenshot (10).png|center|thumb|Example of a drill press SOLIDWORKS assembly converted to a .blend file. The drill press' appearance was modified using Blender. ]] | ||
| + | |||
==Exporting to Unity== | ==Exporting to Unity== | ||
In Blender, from the top left corner, press ''File,'' and then ''Save''. Simply drag and drop the .blend file into Unity, where the assembly can now be used as an asset. If you wish to modify the asset, such as change its size or its appearance, simply open the .blend file and modify it using Blender. | In Blender, from the top left corner, press ''File,'' and then ''Save''. Simply drag and drop the .blend file into Unity, where the assembly can now be used as an asset. If you wish to modify the asset, such as change its size or its appearance, simply open the .blend file and modify it using Blender. | ||
Revision as of 17:23, 23 June 2020
Exporting SOLIDWORKS Assemblies
With SOLIDWORKS, open an assembly file. Under File, select Save As and under Save as type, select .STL.
Afterwards, press the Options button, and make sure that the option Save all components of an assembly in a single file is unchecked. You should now have a .STL file for each assembly part. Place all the .STL files into a single folder.
Importing .STL files into Blender
Open Blender, and delete the Camera, Cube, and Light on the right-hand side of the page by right-clicking on them, and pressing Delete.
Now, from the top left corner, press File, Import and Stl. Navigate towards the folder that contains your .STL files. Once in the folder, CTRL + left-click all the .STL files, and finally click on Import STL. Once imported, the assembly will no longer have the textures or material appearances that were assigned to it in SOLIDWORKS. However, it is possible to assign new colors and/or textures to all the imported components using Blender.
Exporting to Unity
In Blender, from the top left corner, press File, and then Save. Simply drag and drop the .blend file into Unity, where the assembly can now be used as an asset. If you wish to modify the asset, such as change its size or its appearance, simply open the .blend file and modify it using Blender.


