Difference between revisions of "Digital technologies/3D printing/3D modeling- Intermediate/TinkerCAD (contd.)"
Jump to navigation
Jump to search
(Created page with "{{#lsth:Digital technologies/3D printing/3D modeling- Intermediate|TinkerCAD (contd.)}}") |
|||
| Line 1: | Line 1: | ||
{{#lsth:Digital technologies/3D printing/3D modeling- Intermediate|[[Digital technologies/3D printing/3D modeling- Intermediate/TinkerCAD (contd.)|TinkerCAD (contd.)]]}} | {{#lsth:Digital technologies/3D printing/3D modeling- Intermediate|[[Digital technologies/3D printing/3D modeling- Intermediate/TinkerCAD (contd.)|TinkerCAD (contd.)]]}} | ||
| + | [[File:Heart Button TinkerCAD.png|thumb|Heart button CAD model|200x200px|alt=]] | ||
| + | In the beginner section of 3D modeling, you learned how to group shapes together. In advanced TinkerCAD, you will use the skills you have gained to create more complex shapes. TinkerCAD provides you with basic geometries such as cubes and cylinders. You can combine these shapes to create more complex geometries such as a house using the group function. To create even more complicated designs, you can combine shapes to be used to create complex holes | ||
| + | |||
| + | <youtube>kVXkdLfK1kw</youtube> | ||
| + | |||
| + | The example below will walk you through the making of a heart button. It will involve grouping shapes together in order to create a more complex shape and feature | ||
| + | [[File:Heart_Button_Construction.png|alt=|thumb|351x351px|Combining simple shapes like cylinders and cubes to create heart shape. ]] | ||
| + | # Add a box shape to the workspace. Make sure the dimension of the box has the thickness of the desired button. This will serve as the point of the heart. | ||
| + | # Add two cylinders with the same thickness as the box to two edges of the box. Set the diameter of the cylinder as the width of the box. This will create the humps of the heart. | ||
| + | # Using the round roof object, size it to the appropriate dimension for the button hoop. | ||
| + | # Copy and paste<s>r</s> a second round roof object and make it slightly smaller to be used to create the hole for the button hoop. | ||
| + | # Turn the object into a hole and position it accordingly. | ||
| + | # Finally, group the shapes together and the button is completed. | ||
Latest revision as of 19:32, 25 August 2023
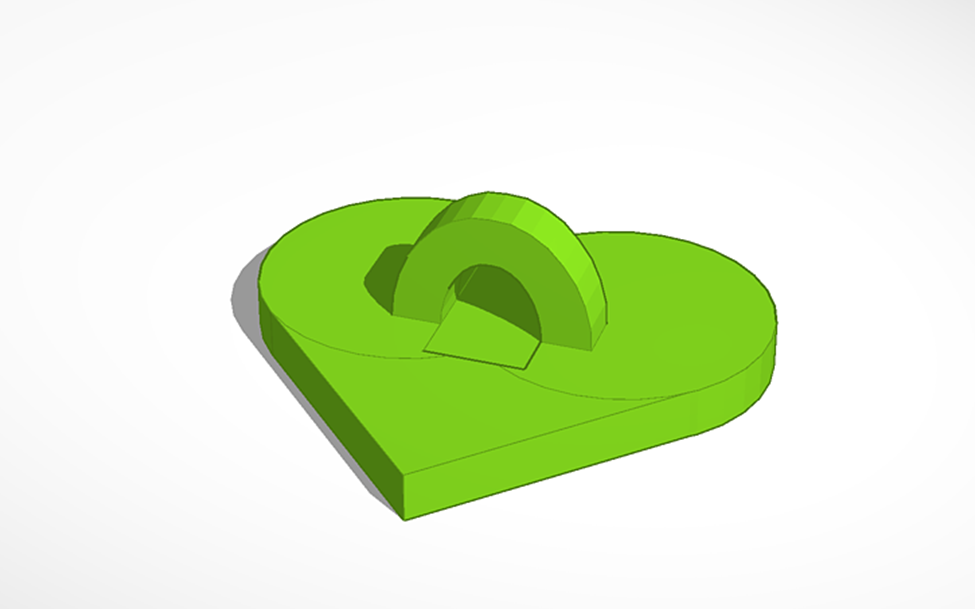
In the beginner section of 3D modeling, you learned how to group shapes together. In advanced TinkerCAD, you will use the skills you have gained to create more complex shapes. TinkerCAD provides you with basic geometries such as cubes and cylinders. You can combine these shapes to create more complex geometries such as a house using the group function. To create even more complicated designs, you can combine shapes to be used to create complex holes
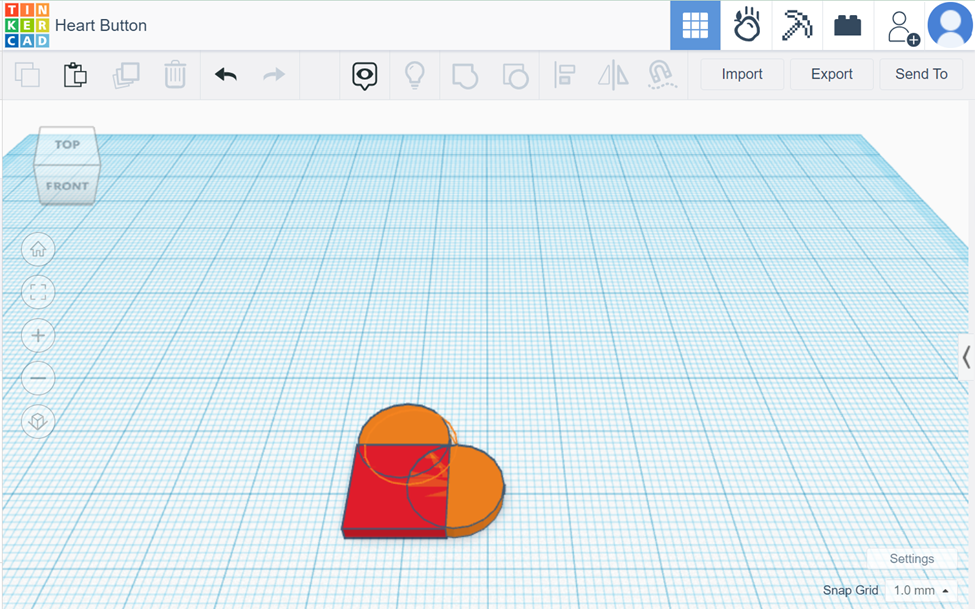
The example below will walk you through the making of a heart button. It will involve grouping shapes together in order to create a more complex shape and feature
- Add a box shape to the workspace. Make sure the dimension of the box has the thickness of the desired button. This will serve as the point of the heart.
- Add two cylinders with the same thickness as the box to two edges of the box. Set the diameter of the cylinder as the width of the box. This will create the humps of the heart.
- Using the round roof object, size it to the appropriate dimension for the button hoop.
- Copy and paste
ra second round roof object and make it slightly smaller to be used to create the hole for the button hoop. - Turn the object into a hole and position it accordingly.
- Finally, group the shapes together and the button is completed.

