Difference between revisions of "Digital technologies/Virtual reality/Virtual reality- Beginner"
| (74 intermediate revisions by 3 users not shown) | |||
| Line 1: | Line 1: | ||
| − | '''Virtual Reality (VR)''' is a system available at the Richard L' | + | '''Virtual Reality (VR)''' is a system available at the Richard L'Abbé Makerspace which immerses users in virtual 360˚ environments. These environments can be in the form of 360˚ videos, 3D application projects (made in [[Unity (Game Engine)|Unity]] or Unreal), or '''Augmented Reality (AR).''' |
| − | The Makerspace currently possesses | + | The Makerspace currently possesses three major VR systems: the Oculus Rift DK2, the Meta Quest 2 and the HTC Vive. Other VR and AR systems available include the Google Cardboard and Xbox Kinect. |
| + | == What is Virtual Reality (VR)?<ref>https://en.wikipedia.org/wiki/Virtual_reality | ||
| + | </ref> == | ||
| + | Virtual Reality is a computer-generated 3-dimensional simulation of a game or environment, that can be interacted with using special equipment. | ||
| + | It is a virtual world with realistic elements, sounds and occurrences comparable to the real world. The simulation is typically run on a device such as a computer, game console or smartphone, and the information is then sent to a VR headset. Upon wearing the headset, the user will be immersed in the virtual world with the ability to move around, interact with characters present and explore the vast virtual world. Nowadays, apart from game creations, VR is applied in other industries such as healthcare, automotive and tourism. Virtual Reality is only one type of technology, that involves altering reality and creating a virtual environment, there exist other varieties of technologies such as [https://en.wikipedia.org/wiki/Augmented_reality Augmented Reality (AR)] and [https://en.wikipedia.org/wiki/Mixed_reality Mixed Reality(MR)]. | ||
| + | |||
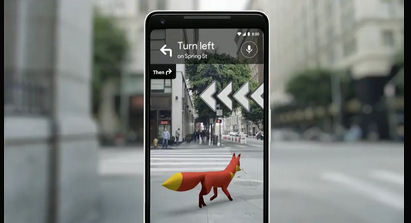
| + | [[File:googleAR.png|thumb|Google AR Navigation<ref>https://www.youtube.com/watch?v=4F0gFpzsYLM</ref>|link=Special:FilePath/GoogleAR.png|alt=]] | ||
| + | Augmented Reality is the superimposition of computer-generated entities onto the physical world. Some applications of AR would be AR doodle, AR emoji camera or even Google AR. Augmented Reality is a combination of the real and virtual world, but there is no interaction between them whatsoever. This is the primary difference between AR and MR. The equipment required when dealing with AR can be most accessible since a mobile phone can be used to overlay digital entities onto the real world. Yet, for more complex tasks AR headsets or special glasses such as the [https://en.wikipedia.org/wiki/Ray-Ban_Stories Ray-ban Meta] can be used. | ||
| + | |||
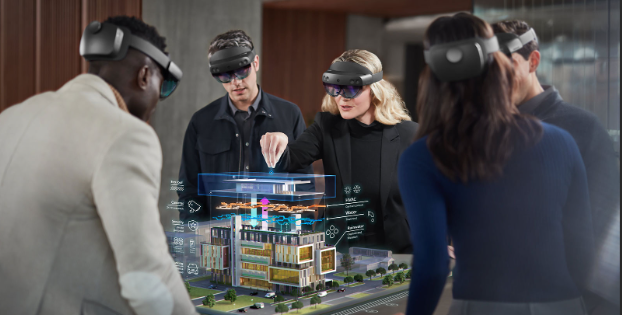
| + | [[File:MixedRealityInteraction.png|thumb|Mixed Reality Interaction<ref>https://learn.microsoft.com/en-us/windows/mixed-reality/design/color-light-and-materials</ref>|link=Special:FilePath/MixedRealityInteraction.png]] | ||
| + | Mixed Reality merges a real-world environment with a virtual one, that is a computer-generated one, and the two worlds can interact with each other. Similarly to Virtual Reality, Mixed Reality requires a headset, such as the [https://www.microsoft.com/en-us/hololens Microsoft Hololens 2], to enable the exchange between the digital world and the real world to occur. | ||
| − | + | All of these technologies together are known as [https://en.wikipedia.org/wiki/Extended_reality Extended Reality (XR)], and they are used increasingly in many fields. | |
| − | |||
| − | |||
| − | |||
==Available Systems in Makerspace== | ==Available Systems in Makerspace== | ||
| Line 19: | Line 26: | ||
===Oculus Rift DevKit2=== | ===Oculus Rift DevKit2=== | ||
| − | The Oculus Rift system is a VR head-mounted display (HMD) system that is owned by Facebook Inc. The Development Kit 2 was introduced in 2014 and allowed developers to begin creating applications prior to the official release of the Oculus Rift system. The DevKit2 only supports positional tracking in the form of head movement within a small radius | + | The Oculus Rift system is a VR head-mounted display (HMD) system that is owned by Facebook Inc. The Development Kit 2 was introduced in 2014 and allowed developers to begin creating applications prior to the official release of the Oculus Rift system. The DevKit2 only supports positional tracking in the form of head movement within a small radius and does not provide controllers or remotes to allow users to interact with their environments. |
| − | The headset has a 980x1080 (per eye) resolution, provided by a modified Samsung Galaxy Note 3 acting as | + | The headset has a 980x1080 (per eye) resolution, provided by a modified Samsung Galaxy Note 3 acting as its screen. |
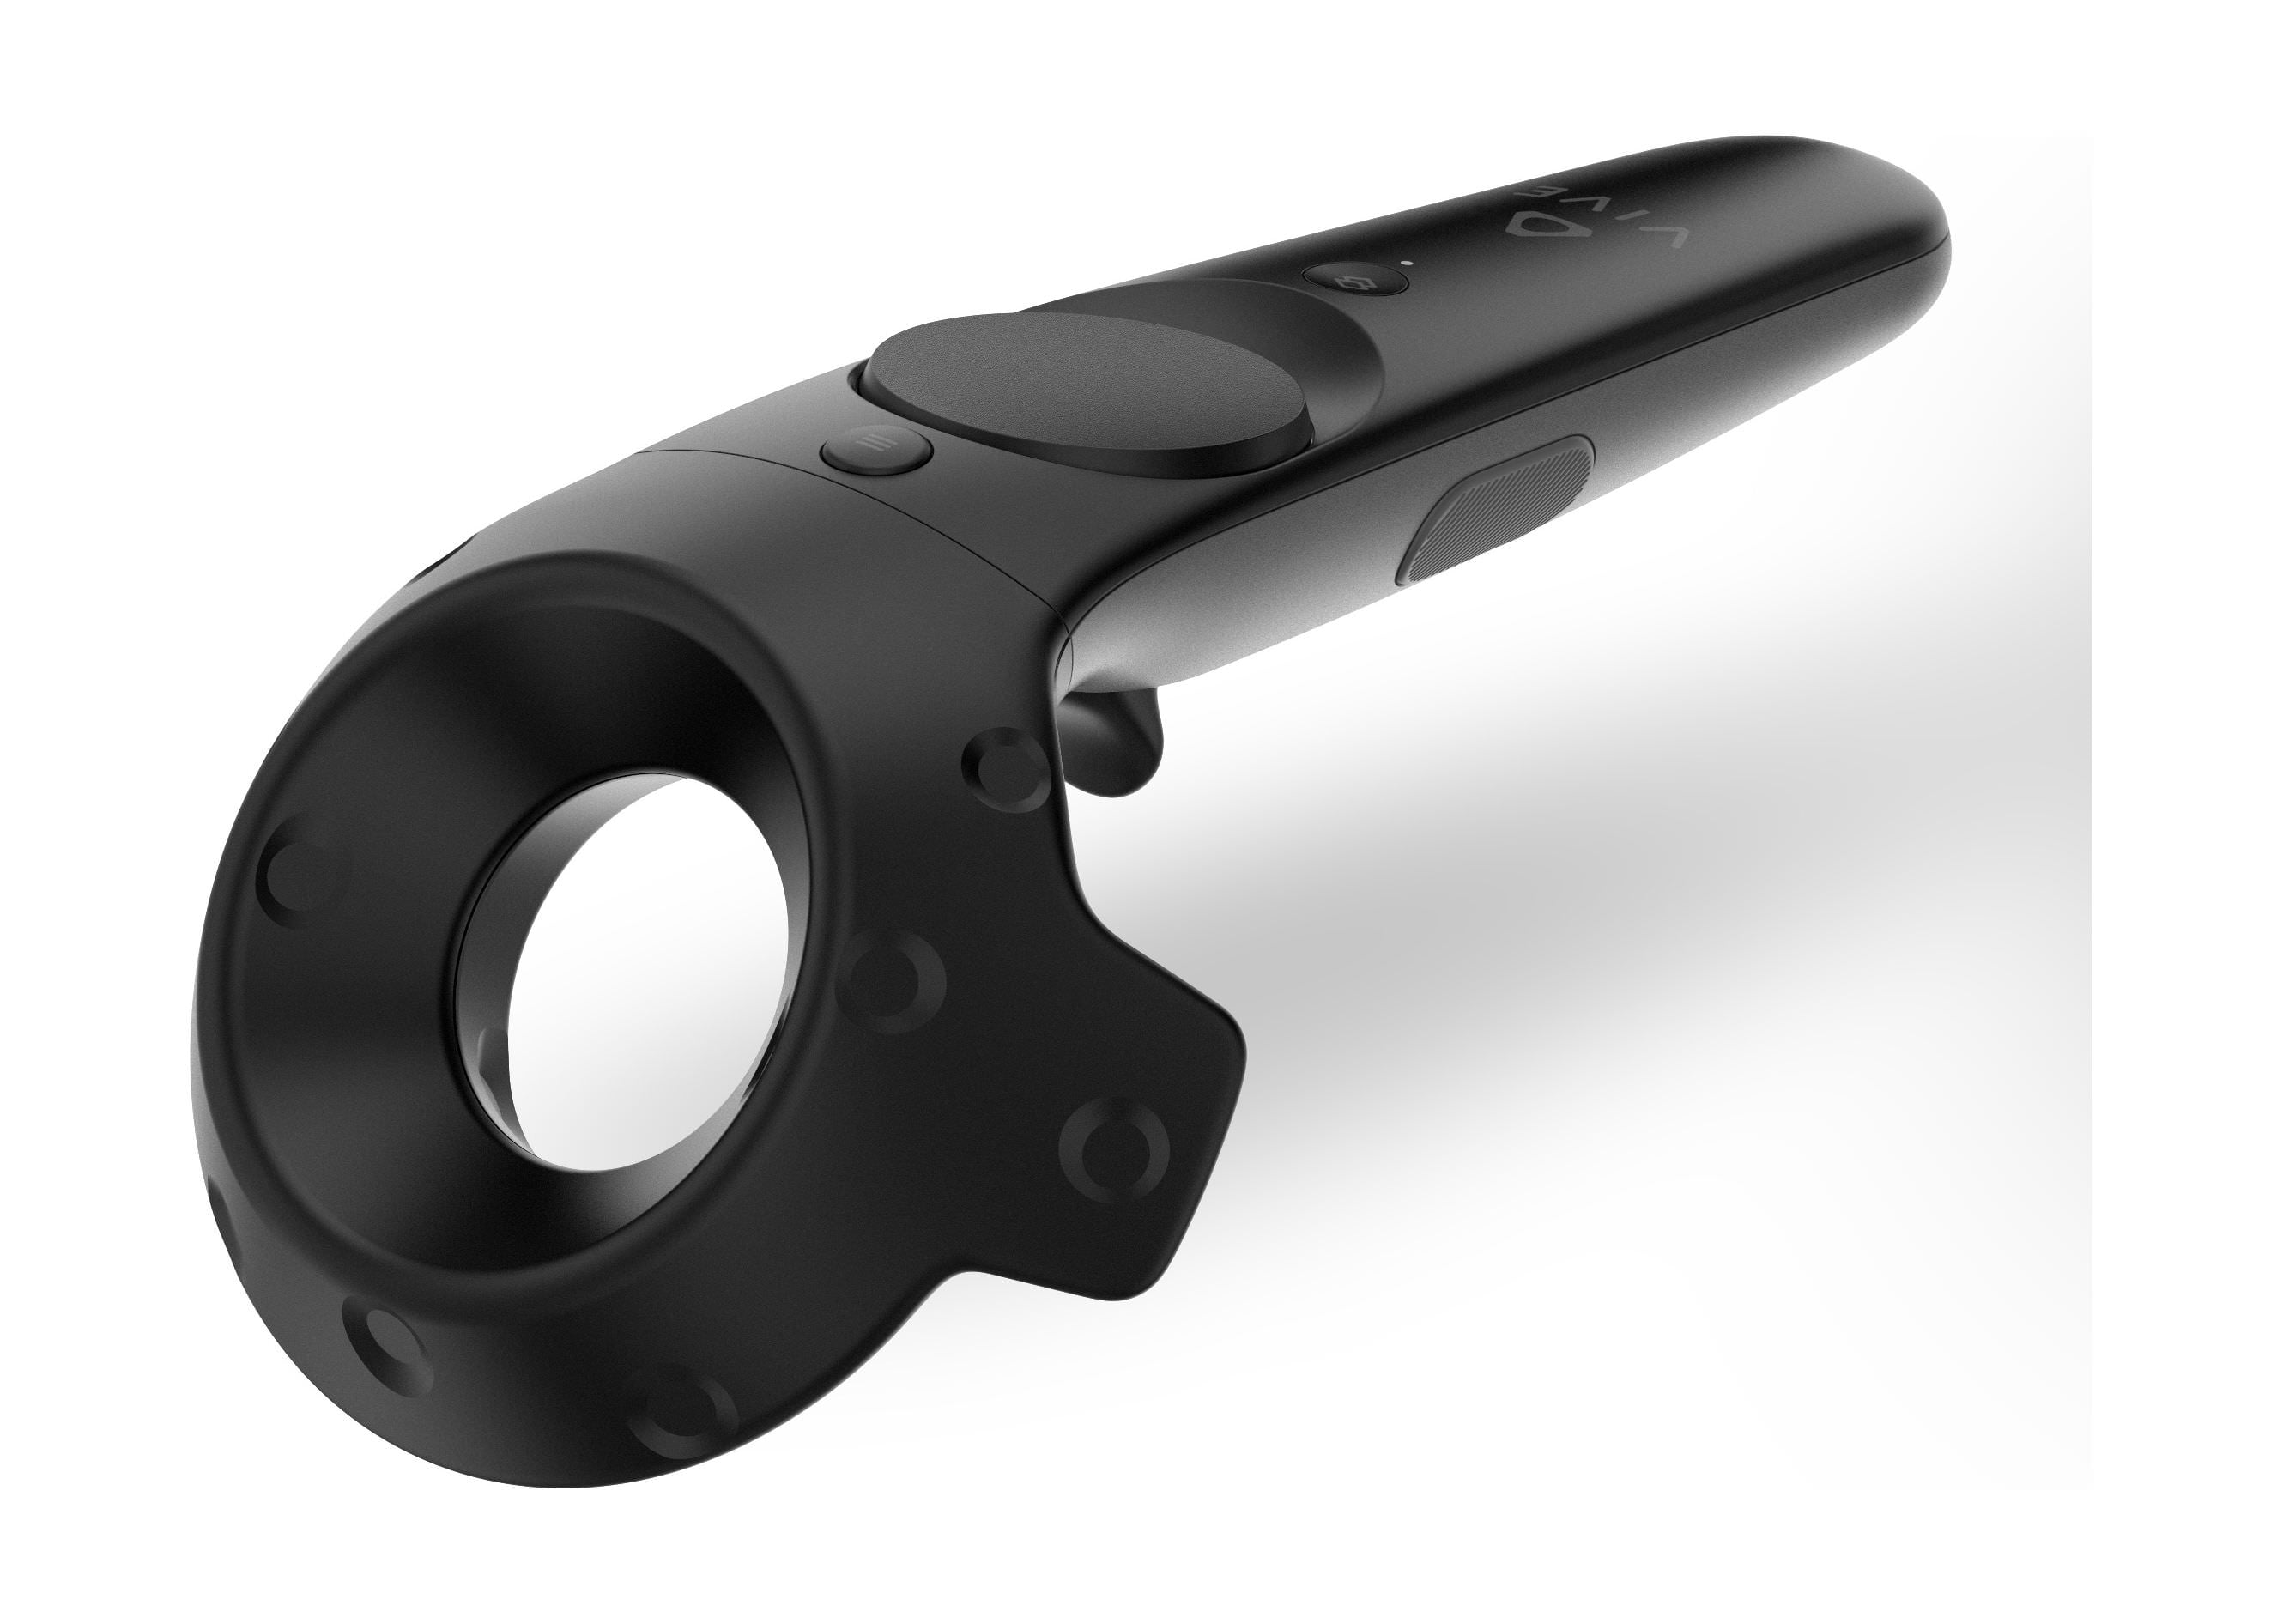
===HTC Vive=== | ===HTC Vive=== | ||
[[File:HTC Vive.png|thumb|HTC Vive]] | [[File:HTC Vive.png|thumb|HTC Vive]] | ||
| − | The HTC Vive is a full room-tracking VR system that includes one HMD, two handheld controllers, and two (or more) lighthouse base stations to track user positional data. The system was released in 2016 and became a very popular system due its robustness and immersive experience. The system was developed by HTC and Valve Corporation, and thus a developer package was released by Valve | + | The HTC Vive is a full room-tracking VR system that includes one HMD, two handheld controllers, and two (or more) lighthouse base stations to track user positional data. The system was released in 2016 and became a very popular system due its robustness and immersive experience. The system was developed by HTC and Valve Corporation, and thus a developer package was released by Valve known as "SteamVR" to allow developers to create applications on the headset using the Unity game engine. |
| − | The headset has a 1080x1200 (per eye) resolution, a 90 Hz refresh rate, and a 110 degree nominal field of view. The headset also supports users wearing non-bulky glasses while playing by adjusting the headstrap, focal distance, and eye distance. | + | The headset has a 1080x1200 (per eye) resolution, a 90 Hz refresh rate, and a 110-degree nominal field of view. The headset also supports users wearing non-bulky glasses while playing by adjusting the headstrap, focal distance, and eye distance. |
| − | ====Adjusting Headset for Usage==== | + | ==== Adjusting Headset for Usage==== |
If you would like to adjust the headset for your personal comfort, several steps can be taken to get the best possible experience. ''Note: a tight fit is imperative for a non-blurry experience.'' | If you would like to adjust the headset for your personal comfort, several steps can be taken to get the best possible experience. ''Note: a tight fit is imperative for a non-blurry experience.'' | ||
#To adjust the head size, undo the velcro on the left and right side of the headset. Once you put the headset on, pull both straps with equal force until the fit is tight, and then fasten the velcro again. | #To adjust the head size, undo the velcro on the left and right side of the headset. Once you put the headset on, pull both straps with equal force until the fit is tight, and then fasten the velcro again. | ||
| − | #To adjust the head size from the top for users with | + | #To adjust the head size from the top, for users with headgear or tied-up hair, undo the velcro on the top side of the headset. Once you put the headset on, pull the strap until it fits with your head size and doesn't slip off. |
#To adjust the focal distance between the lenses and screen, locate the two mount points on either side of the headset (where the straps meet the display body) and pull the two gray dials outward. Once you've done so, turn both dials simultaneously either forward or backward until the image appears clear. | #To adjust the focal distance between the lenses and screen, locate the two mount points on either side of the headset (where the straps meet the display body) and pull the two gray dials outward. Once you've done so, turn both dials simultaneously either forward or backward until the image appears clear. | ||
#To adjust the distance between eyes, locate the small adjustment dial on the lower-right side of the headset's display. With the headset on your head, turn the dial in either direction to adjust the distance between eyes. The exact distance modified will be shown on the HMD screen when the system is on. Adjust until image is visually clear. | #To adjust the distance between eyes, locate the small adjustment dial on the lower-right side of the headset's display. With the headset on your head, turn the dial in either direction to adjust the distance between eyes. The exact distance modified will be shown on the HMD screen when the system is on. Adjust until image is visually clear. | ||
| + | |||
| + | ===Meta Quest 2=== | ||
| + | [[File:MetaQuest2.png|thumb|Meta Quest 2]] | ||
| + | The Meta Quest 2<ref>https://en.wikipedia.org/wiki/Quest_2</ref> is a VR headset developed by Reality Labs (Meta Platforms) accompanied with two hand-held controllers. Once known as Oculus Quest 2, it was recently rebranded as Meta Quest 2 following the rebranding of Facebook Inc. as Meta. As with its predecessor, the Quest 2 can run as either a standalone headset with an internal, Android-based operating system, or even with Oculus Rift-compatible VR software, running on a laptop or computer. | ||
| + | |||
| + | The Meta Quest 2 specifications<ref>https://www.wevolver.com/specs/meta-quest-2</ref> comprise of an 1832 x 1932 display resolution (per eye), a 72Hz and 90Hz refresh rate, and is experimenting versions with a 120 Hz refresh rate. Its connectivity to a laptop is possible using a USB-C cable or a 3.5 mm headphone jack. It is also possible wirelessly using Bluetooth or WIFI. It is lighter than the first-generation quest and weighs 503 grams. It comes with two storage options namely 128 GB and 256 GB. | ||
| + | |||
| + | ====Adjusting Headset for Usage==== | ||
| + | These steps can be taken to adjust the Meta Quest 2 so as to ensure comfort and a high-quality screen is visible, hence accounting for a worthwhile experience in the virtual environment. | ||
| + | |||
| + | # <ref>https://www.meta.com/help/quest/articles/headsets-and-accessories/product-care-and-best-practices/adjust-and-clean-straps/</ref>To adjust the lenses, shift them gently to the left and then to the right until you reach a position that enables you to have the clearest view of the screen. | ||
| + | # After that, you need to adjust the side straps. To loosen the headset, sliders should be moved towards the top strap and to tighten it, the sliders should be moved away from the top strap. | ||
| + | # After having moved the sliders, the top strap should be centered between the sliders in such a way that the two sides are equal, and the top strap is centered on the head when the headset is worn. | ||
| + | # For people wearing glasses, the [https://www.meta.com/help/quest/articles/getting-started/getting-started-with-quest-2/wear-glasses-with-quest-2/ glasses spacer] should be inserted, from front to back, in the headset. | ||
| + | # For any further adjustments, the headset will have to be removed so as to rearrange the side straps with the sliders. | ||
| + | # Once the side straps have been set, the headset should be worn to adjust the top strap, by pulling apart the velcro and reattaching it, ensuring that the headset rests lightly on one's face and the picture is clearly visible. | ||
| + | # You can fine tune your headset fit and visibility by moving the firm arms on the sides of the headset up and down to adjust the angle of the equipment against your face. | ||
| + | |||
| + | |||
| + | The following YouTube video outlines how to proceed to adjust the Meta Quest 2 so as to ensure a comfortable and positive experience whilst immersed in the virtual environment. It demonstrates how to choose the most comfortable fit pack for an individual and adjust the strap to ensure that is perfectly suited to the user. | ||
| + | |||
| + | |||
| + | |||
| + | <youtube>va-tBtxtxD0</youtube> | ||
| + | |||
| + | |||
| + | |||
| + | |||
[[File:Google Cardboard.png|thumb|Google Cardboard]] | [[File:Google Cardboard.png|thumb|Google Cardboard]] | ||
===Google Cardboard=== | ===Google Cardboard=== | ||
| − | The Google Cardboard is a lens display for most modern smartphone devices with built in gyroscopes. By inserting your phone into the headset and enabling VR mode, the HMD becomes a non-positional tracking 360 degree viewer that allows the viewing of | + | The Google Cardboard is a lens display for most modern smartphone devices with built in gyroscopes. By inserting your phone into the headset and enabling VR mode, the HMD (Head Mounted Display) becomes a non-positional tracking 360-degree viewer that allows the viewing of 360˚ videos or scenarios. |
| − | ====Smartphone Setup for | + | ====Smartphone Setup for 360˚ YouTube Videos==== |
| − | In order to view 360 degree videos on the official YouTube app, follow the steps outlined below: | + | In order to view 360-degree videos on the official YouTube app, follow the steps outlined below: |
#Download the official YouTube app from the Appstore (IOS), Play Store (Android), or your smartphones personal app marketplace. | #Download the official YouTube app from the Appstore (IOS), Play Store (Android), or your smartphones personal app marketplace. | ||
| − | #Open the app and locate a video that is a 360 degree video. | + | #Open the app and locate a video that is a 360-degree video. |
| − | #In the lower right corner of the video player, tap the Google Cardboard icon. A white bar should now appear in between the video. | + | # In the lower right corner of the video player, tap the Google Cardboard icon. A white bar should now appear in between the video. |
| − | #Place the phone in the cardboard and align the center of the headset with the white line on the video. | + | # Place the phone in the cardboard and align the center of the headset with the white line on the video. |
| − | #Press play and fasten the | + | #Press play and fasten the Velcro. |
| + | |||
| + | == Equipment and Systems== | ||
| + | |||
| + | ===What are VR headsets?=== | ||
| + | A VR headset is a fully immersive device that is worn on your head, using 3D near-eye displays and positional tracking providing a virtual reality environment for the user It also contains multiple sensors such as the [https://en.wikipedia.org/wiki/Gyroscope gyroscope] to help calibrate the movement in the simulation with your actual movement. VR headsets are mostly used with VR video games but are increasingly used in other fields nowadays. There are different types of VR headsets such as: | ||
| + | |||
| + | ==== Standalone ==== | ||
| + | Standalone headsets are able to work independently of an external device such as a PC or gaming console. They have their own system that is able to power and run the simulation. | ||
| + | |||
| + | ====Tethered==== | ||
| + | Tethered headsets are used in collaboration with another device such as a PC or gaming console. These headsets act as the screens and sensor for the simulation however the actual image processing occurs within the external device. You are also able to get very basic VR headsets that can be used with your smartphones screen to create a virtual Environment. | ||
| + | |||
| + | ===Other VR Devices=== | ||
| + | Over time many various other devices have been created that allow you to interact with a VR simulation, for example, there are controllers shaped like weapons that interact with first-person combat games, additionally there are also vests that simulate sensations occurring in the virtual environment through vibrations or temperature changes. | ||
| + | [[File:Vive cont.png|left|thumb|Cited from: https://i5.walmartimages.com/asr/96a045f7-6590-4ef1-a270-cbe1aa5c3a84_1.a9446a4691bec18f7ca8050976af7b3a.jpeg]] | ||
| + | [[File:Vest.png|none|thumb|312x312px|Cited from: https://www.bhaptics.com/tactsuit]] | ||
| + | |||
| + | |||
| + | === Uses of VR === | ||
| + | |||
| + | [[File:VR in medicine.png|thumb|VR in medicine<ref>https://www.nanalyze.com/2023/11/surgical-science-stock-medical-vr/</ref>]] | ||
| + | |||
| + | VR is becoming steadily more useful for education and training.VR trainings in medicine allow students to interact with and experience various scenarios that give them a greater understanding of a subject. Additionally, VR simulations will be used to explain complex procedures and treatments to patients in order to ease their anxiety and further their knowledge of their conditions. <ref>E. Delzell, “Virtual reality: How is it used in medicine?,” ''WebMD''. [Online]. Available: <nowiki>https://www.webmd.com/a-to-z-guides/features/virtual-reality-medicine#:~:text=Therapeutic%20virtual%20reality%20(VR)%2C,complex%20medical%20procedure%20or%20condition</nowiki>. [Accessed: 23-Aug-2022].</ref> Furthermore, over time, more companies have begun using VR to demonstrate their product in order to allow their consumers to have a better understanding of the products that they will be using. VR is also used in military training, architecture, tourism and even the film industry. People can even use AR for interior designing their own homes, for example. VR is so versatile that its uses throughout different spheres of life is attainable. | ||
| + | |||
| + | === What is Steam?=== | ||
| + | [https://store.steampowered.com/ Steam] is an online gaming library; it allows you to get access to and purchase various games that can be played on the PC. Many free and paid games can be found on the platform for you to use. Because using a VR headset requires the system to output the video to the headsets in a specific manner, [https://store.steampowered.com/app/250820/SteamVR/ SteamVR] is used to play the VR games through your PC. The application is compatible with the HTC Vive, Oculus Rift and etc..., | ||
| + | |||
| + | There are other softwares that can be used with the VR headset such as Littlestar, VRWorks, G2 Deals and etc, which software you would use is dependent on a few criteria, such as what kind of experience do you want from virtual reality, and if you would like to consume or create content. | ||
| + | |||
| + | ==How to Set up the Systems== | ||
| + | |||
| + | ===Oculus Rift DevKit2=== | ||
| + | |||
| + | #Go to [https://developer.oculus.com/downloads/ developer.oculusvr.com] | ||
| + | #Click on PC SDK | ||
| + | #Then download and install the runtime and SDK file for your appropriate operating system. | ||
| + | #Plug the HDMI and USB into your computer and the other end into the headset. | ||
| + | #Next plug the power supply into the brick and then into the wall. | ||
| + | #Then plug the curved end of the sync cable into the camera’s top plug and the other end into the brick. | ||
| + | #Finally plug the curved end of the micro-USB into the camera and the other end into the computer. | ||
| + | |||
| + | '''How to configure''' | ||
| + | |||
| + | #Go to the eye icon in the taskbar and double click on it in order to open the configuration utility. | ||
| + | #Ensure that the device is on, and in here you can adjust the different parameters to calibrate the screen and you are also able to create profiles for each person to aid in swapping through different configurations. | ||
| + | #You are also able to edit the display mode from the Display Mode window found under tools. | ||
| + | #Furthermore, you may use demo scene to test out the VR and ensure that everything is working as they should. | ||
| + | <youtube>DvjgvDPOtN4</youtube> | ||
| + | |||
| + | ===HTC Vive === | ||
| + | |||
| + | # Set up your play area by placing the cameras in opposite corners of the play area (max distance of 5 meters) | ||
| + | #Go to https://www.vive.com/ca/setup/ and download the Vive software, you will also need Steam. | ||
| + | #Next mount the base stations and then attach the cameras and plug in the power cables. If the cameras are unable to see each other, use the sync cable. | ||
| + | #To wire the headset, plug the power adapter into the link box and then into the wall. | ||
| + | #Then you will connect the link box and PC via the USB and HDMI cable. | ||
| + | #Next you will connect the wires from the headset to the orange side of the link box. | ||
| + | #To set up the controllers, power them on. | ||
| + | #Finally, you will set up your play area by clicking on launch steam VR, then following the instructions on the screen. | ||
| + | <youtube>rv6nVPPDmEI</youtube> | ||
| + | |||
| + | ===Meta Quest 2=== | ||
| + | [[File:Meta Quest Software.png|thumb|Meta Quest Software]] | ||
| + | # Set up your play area in a safe place with minimal hazards present. | ||
| + | #Go to https://www.meta.com/ca/quest/setup/ and download the Meta Quest 2 Software. Note the software is already downloaded on the laptops at the Makerspace. | ||
| + | #After ensuring that your headset is adequately charged, go to the software and pair your laptop with your headset. | ||
| + | #To set up the controllers, power them on. | ||
| + | #Finally, you will set up your play area by clicking on launch VR, then following the instructions on the screen. | ||
| + | |||
| + | The following YouTube video will also give you a clear demonstration on how to set up your actual environment, your headset and the software required to enable your immersive experience to occur. | ||
| + | <youtube>z8mU6bCN0H0</youtube> | ||
| + | |||
| + | |||
| + | |||
| − | == | + | ==VR Game and Application Development== |
| + | There are many different tools and platforms that you can use in order to develop VR games and applications. There are a few things to look into when deciding what software to use for your app. For example: | ||
| − | + | * What equipment will you be using? Oculus, HTC VIVE, PlayStation etc. | |
| + | * What is the purpose of the software? Will you make a game, animation, application? | ||
| − | + | '''Some examples of software are:''' | |
| − | == | + | *'''[https://unity.com/ Unity:]''' Can make games, applications and has many online tutorials. Can make programs compatible with many different types of headsets. Click [https://www.youtube.com/watch?v=rfcX07uiQmA&list=PLnaniYoE3lPtwmwlRRKUtxT9fF7I3UJfO here] for further information on how to develop using Unity with the HTC Vive. |
| + | *'''[https://aws.amazon.com/sumerian/ Amazon Sumerian:]''' This application is really good for creating training simulations and doesn’t require you to have any previous programming knowledge to use it. | ||
| + | *'''[https://developers.google.com/vr Google VR for Everyone:]''' This software has multiple different tools that can be used on multiple different platforms such as Unity, Unreal, Android etc. | ||
| + | *'''[https://www.unrealengine.com/en-US Unreal Engine 4:]''' This platform allows you to create various different applications and allows you to access the C++ and python of the application as well. | ||
| + | *'''[https://www.cryengine.com/ CryEngine:]''' can create various different applications that can be used with the Oculus, PlayStation and etc. | ||
| + | *'''[https://www.blender.org/ Blender:]''' this application is great for creating characters and 3D videos for a VR environment, an experienced VR enthusiast is able to further manipulate the application via Python scripts.<ref>A. Davies, “10 great tools for VR Development I DevTeam.space,” ''DevTeam.Space'', 29-Jun-2022. [Online]. Available: <nowiki>https://www.devteam.space/blog/10-great-tools-for-vr-development/</nowiki>. [Accessed: 23-Aug-2022].</ref> | ||
==Tutorials on VR Development== | ==Tutorials on VR Development== | ||
| Line 68: | Line 184: | ||
*[[Tutorial: Installing Unity|Large 3D Terrain Generator]] | *[[Tutorial: Installing Unity|Large 3D Terrain Generator]] | ||
| − | *[[ | + | *[[Unity (Game Engine)|Unity Game Engine]] |
| + | *[[Digital technologies/Virtual reality/Unity Project Resources|Unity Project Resources]] | ||
| + | * | ||
| − | < | + | ==References == |
| + | <references /> | ||
Latest revision as of 18:09, 14 June 2024
Virtual Reality (VR) is a system available at the Richard L'Abbé Makerspace which immerses users in virtual 360˚ environments. These environments can be in the form of 360˚ videos, 3D application projects (made in Unity or Unreal), or Augmented Reality (AR).
The Makerspace currently possesses three major VR systems: the Oculus Rift DK2, the Meta Quest 2 and the HTC Vive. Other VR and AR systems available include the Google Cardboard and Xbox Kinect.
What is Virtual Reality (VR)?[1]
Virtual Reality is a computer-generated 3-dimensional simulation of a game or environment, that can be interacted with using special equipment.
It is a virtual world with realistic elements, sounds and occurrences comparable to the real world. The simulation is typically run on a device such as a computer, game console or smartphone, and the information is then sent to a VR headset. Upon wearing the headset, the user will be immersed in the virtual world with the ability to move around, interact with characters present and explore the vast virtual world. Nowadays, apart from game creations, VR is applied in other industries such as healthcare, automotive and tourism. Virtual Reality is only one type of technology, that involves altering reality and creating a virtual environment, there exist other varieties of technologies such as Augmented Reality (AR) and Mixed Reality(MR).
Augmented Reality is the superimposition of computer-generated entities onto the physical world. Some applications of AR would be AR doodle, AR emoji camera or even Google AR. Augmented Reality is a combination of the real and virtual world, but there is no interaction between them whatsoever. This is the primary difference between AR and MR. The equipment required when dealing with AR can be most accessible since a mobile phone can be used to overlay digital entities onto the real world. Yet, for more complex tasks AR headsets or special glasses such as the Ray-ban Meta can be used.
Mixed Reality merges a real-world environment with a virtual one, that is a computer-generated one, and the two worlds can interact with each other. Similarly to Virtual Reality, Mixed Reality requires a headset, such as the Microsoft Hololens 2, to enable the exchange between the digital world and the real world to occur.
All of these technologies together are known as Extended Reality (XR), and they are used increasingly in many fields.
Available Systems in Makerspace

Oculus Rift DevKit2
The Oculus Rift system is a VR head-mounted display (HMD) system that is owned by Facebook Inc. The Development Kit 2 was introduced in 2014 and allowed developers to begin creating applications prior to the official release of the Oculus Rift system. The DevKit2 only supports positional tracking in the form of head movement within a small radius and does not provide controllers or remotes to allow users to interact with their environments.
The headset has a 980x1080 (per eye) resolution, provided by a modified Samsung Galaxy Note 3 acting as its screen.
HTC Vive

The HTC Vive is a full room-tracking VR system that includes one HMD, two handheld controllers, and two (or more) lighthouse base stations to track user positional data. The system was released in 2016 and became a very popular system due its robustness and immersive experience. The system was developed by HTC and Valve Corporation, and thus a developer package was released by Valve known as "SteamVR" to allow developers to create applications on the headset using the Unity game engine.
The headset has a 1080x1200 (per eye) resolution, a 90 Hz refresh rate, and a 110-degree nominal field of view. The headset also supports users wearing non-bulky glasses while playing by adjusting the headstrap, focal distance, and eye distance.
Adjusting Headset for Usage
If you would like to adjust the headset for your personal comfort, several steps can be taken to get the best possible experience. Note: a tight fit is imperative for a non-blurry experience.
- To adjust the head size, undo the velcro on the left and right side of the headset. Once you put the headset on, pull both straps with equal force until the fit is tight, and then fasten the velcro again.
- To adjust the head size from the top, for users with headgear or tied-up hair, undo the velcro on the top side of the headset. Once you put the headset on, pull the strap until it fits with your head size and doesn't slip off.
- To adjust the focal distance between the lenses and screen, locate the two mount points on either side of the headset (where the straps meet the display body) and pull the two gray dials outward. Once you've done so, turn both dials simultaneously either forward or backward until the image appears clear.
- To adjust the distance between eyes, locate the small adjustment dial on the lower-right side of the headset's display. With the headset on your head, turn the dial in either direction to adjust the distance between eyes. The exact distance modified will be shown on the HMD screen when the system is on. Adjust until image is visually clear.
Meta Quest 2

The Meta Quest 2[4] is a VR headset developed by Reality Labs (Meta Platforms) accompanied with two hand-held controllers. Once known as Oculus Quest 2, it was recently rebranded as Meta Quest 2 following the rebranding of Facebook Inc. as Meta. As with its predecessor, the Quest 2 can run as either a standalone headset with an internal, Android-based operating system, or even with Oculus Rift-compatible VR software, running on a laptop or computer.
The Meta Quest 2 specifications[5] comprise of an 1832 x 1932 display resolution (per eye), a 72Hz and 90Hz refresh rate, and is experimenting versions with a 120 Hz refresh rate. Its connectivity to a laptop is possible using a USB-C cable or a 3.5 mm headphone jack. It is also possible wirelessly using Bluetooth or WIFI. It is lighter than the first-generation quest and weighs 503 grams. It comes with two storage options namely 128 GB and 256 GB.
Adjusting Headset for Usage
These steps can be taken to adjust the Meta Quest 2 so as to ensure comfort and a high-quality screen is visible, hence accounting for a worthwhile experience in the virtual environment.
- [6]To adjust the lenses, shift them gently to the left and then to the right until you reach a position that enables you to have the clearest view of the screen.
- After that, you need to adjust the side straps. To loosen the headset, sliders should be moved towards the top strap and to tighten it, the sliders should be moved away from the top strap.
- After having moved the sliders, the top strap should be centered between the sliders in such a way that the two sides are equal, and the top strap is centered on the head when the headset is worn.
- For people wearing glasses, the glasses spacer should be inserted, from front to back, in the headset.
- For any further adjustments, the headset will have to be removed so as to rearrange the side straps with the sliders.
- Once the side straps have been set, the headset should be worn to adjust the top strap, by pulling apart the velcro and reattaching it, ensuring that the headset rests lightly on one's face and the picture is clearly visible.
- You can fine tune your headset fit and visibility by moving the firm arms on the sides of the headset up and down to adjust the angle of the equipment against your face.
The following YouTube video outlines how to proceed to adjust the Meta Quest 2 so as to ensure a comfortable and positive experience whilst immersed in the virtual environment. It demonstrates how to choose the most comfortable fit pack for an individual and adjust the strap to ensure that is perfectly suited to the user.

Google Cardboard
The Google Cardboard is a lens display for most modern smartphone devices with built in gyroscopes. By inserting your phone into the headset and enabling VR mode, the HMD (Head Mounted Display) becomes a non-positional tracking 360-degree viewer that allows the viewing of 360˚ videos or scenarios.
Smartphone Setup for 360˚ YouTube Videos
In order to view 360-degree videos on the official YouTube app, follow the steps outlined below:
- Download the official YouTube app from the Appstore (IOS), Play Store (Android), or your smartphones personal app marketplace.
- Open the app and locate a video that is a 360-degree video.
- In the lower right corner of the video player, tap the Google Cardboard icon. A white bar should now appear in between the video.
- Place the phone in the cardboard and align the center of the headset with the white line on the video.
- Press play and fasten the Velcro.
Equipment and Systems
What are VR headsets?
A VR headset is a fully immersive device that is worn on your head, using 3D near-eye displays and positional tracking providing a virtual reality environment for the user It also contains multiple sensors such as the gyroscope to help calibrate the movement in the simulation with your actual movement. VR headsets are mostly used with VR video games but are increasingly used in other fields nowadays. There are different types of VR headsets such as:
Standalone
Standalone headsets are able to work independently of an external device such as a PC or gaming console. They have their own system that is able to power and run the simulation.
Tethered
Tethered headsets are used in collaboration with another device such as a PC or gaming console. These headsets act as the screens and sensor for the simulation however the actual image processing occurs within the external device. You are also able to get very basic VR headsets that can be used with your smartphones screen to create a virtual Environment.
Other VR Devices
Over time many various other devices have been created that allow you to interact with a VR simulation, for example, there are controllers shaped like weapons that interact with first-person combat games, additionally there are also vests that simulate sensations occurring in the virtual environment through vibrations or temperature changes.


Uses of VR

VR is becoming steadily more useful for education and training.VR trainings in medicine allow students to interact with and experience various scenarios that give them a greater understanding of a subject. Additionally, VR simulations will be used to explain complex procedures and treatments to patients in order to ease their anxiety and further their knowledge of their conditions. [8] Furthermore, over time, more companies have begun using VR to demonstrate their product in order to allow their consumers to have a better understanding of the products that they will be using. VR is also used in military training, architecture, tourism and even the film industry. People can even use AR for interior designing their own homes, for example. VR is so versatile that its uses throughout different spheres of life is attainable.
What is Steam?
Steam is an online gaming library; it allows you to get access to and purchase various games that can be played on the PC. Many free and paid games can be found on the platform for you to use. Because using a VR headset requires the system to output the video to the headsets in a specific manner, SteamVR is used to play the VR games through your PC. The application is compatible with the HTC Vive, Oculus Rift and etc...,
There are other softwares that can be used with the VR headset such as Littlestar, VRWorks, G2 Deals and etc, which software you would use is dependent on a few criteria, such as what kind of experience do you want from virtual reality, and if you would like to consume or create content.
How to Set up the Systems
Oculus Rift DevKit2
- Go to developer.oculusvr.com
- Click on PC SDK
- Then download and install the runtime and SDK file for your appropriate operating system.
- Plug the HDMI and USB into your computer and the other end into the headset.
- Next plug the power supply into the brick and then into the wall.
- Then plug the curved end of the sync cable into the camera’s top plug and the other end into the brick.
- Finally plug the curved end of the micro-USB into the camera and the other end into the computer.
How to configure
- Go to the eye icon in the taskbar and double click on it in order to open the configuration utility.
- Ensure that the device is on, and in here you can adjust the different parameters to calibrate the screen and you are also able to create profiles for each person to aid in swapping through different configurations.
- You are also able to edit the display mode from the Display Mode window found under tools.
- Furthermore, you may use demo scene to test out the VR and ensure that everything is working as they should.
HTC Vive
- Set up your play area by placing the cameras in opposite corners of the play area (max distance of 5 meters)
- Go to https://www.vive.com/ca/setup/ and download the Vive software, you will also need Steam.
- Next mount the base stations and then attach the cameras and plug in the power cables. If the cameras are unable to see each other, use the sync cable.
- To wire the headset, plug the power adapter into the link box and then into the wall.
- Then you will connect the link box and PC via the USB and HDMI cable.
- Next you will connect the wires from the headset to the orange side of the link box.
- To set up the controllers, power them on.
- Finally, you will set up your play area by clicking on launch steam VR, then following the instructions on the screen.
Meta Quest 2

- Set up your play area in a safe place with minimal hazards present.
- Go to https://www.meta.com/ca/quest/setup/ and download the Meta Quest 2 Software. Note the software is already downloaded on the laptops at the Makerspace.
- After ensuring that your headset is adequately charged, go to the software and pair your laptop with your headset.
- To set up the controllers, power them on.
- Finally, you will set up your play area by clicking on launch VR, then following the instructions on the screen.
The following YouTube video will also give you a clear demonstration on how to set up your actual environment, your headset and the software required to enable your immersive experience to occur.
VR Game and Application Development
There are many different tools and platforms that you can use in order to develop VR games and applications. There are a few things to look into when deciding what software to use for your app. For example:
- What equipment will you be using? Oculus, HTC VIVE, PlayStation etc.
- What is the purpose of the software? Will you make a game, animation, application?
Some examples of software are:
- Unity: Can make games, applications and has many online tutorials. Can make programs compatible with many different types of headsets. Click here for further information on how to develop using Unity with the HTC Vive.
- Amazon Sumerian: This application is really good for creating training simulations and doesn’t require you to have any previous programming knowledge to use it.
- Google VR for Everyone: This software has multiple different tools that can be used on multiple different platforms such as Unity, Unreal, Android etc.
- Unreal Engine 4: This platform allows you to create various different applications and allows you to access the C++ and python of the application as well.
- CryEngine: can create various different applications that can be used with the Oculus, PlayStation and etc.
- Blender: this application is great for creating characters and 3D videos for a VR environment, an experienced VR enthusiast is able to further manipulate the application via Python scripts.[9]
Tutorials on VR Development
Other resources
References
- ↑ https://en.wikipedia.org/wiki/Virtual_reality
- ↑ https://www.youtube.com/watch?v=4F0gFpzsYLM
- ↑ https://learn.microsoft.com/en-us/windows/mixed-reality/design/color-light-and-materials
- ↑ https://en.wikipedia.org/wiki/Quest_2
- ↑ https://www.wevolver.com/specs/meta-quest-2
- ↑ https://www.meta.com/help/quest/articles/headsets-and-accessories/product-care-and-best-practices/adjust-and-clean-straps/
- ↑ https://www.nanalyze.com/2023/11/surgical-science-stock-medical-vr/
- ↑ E. Delzell, “Virtual reality: How is it used in medicine?,” WebMD. [Online]. Available: https://www.webmd.com/a-to-z-guides/features/virtual-reality-medicine#:~:text=Therapeutic%20virtual%20reality%20(VR)%2C,complex%20medical%20procedure%20or%20condition. [Accessed: 23-Aug-2022].
- ↑ A. Davies, “10 great tools for VR Development I DevTeam.space,” DevTeam.Space, 29-Jun-2022. [Online]. Available: https://www.devteam.space/blog/10-great-tools-for-vr-development/. [Accessed: 23-Aug-2022].