Difference between revisions of "Digital technologies/Laser cutting/Vector graphics- Beginner/Preparing Files for the Laser Cutter"
(Created page with "{{#lsth:Digital technologies/Laser cutting/Vector graphics- Beginner|Digital technologies/Laser cutting/Vector graphics- Beginner/Preparing Files for the Laser Cutter|Prepar...") |
(No difference)
|
Latest revision as of 22:26, 28 July 2022
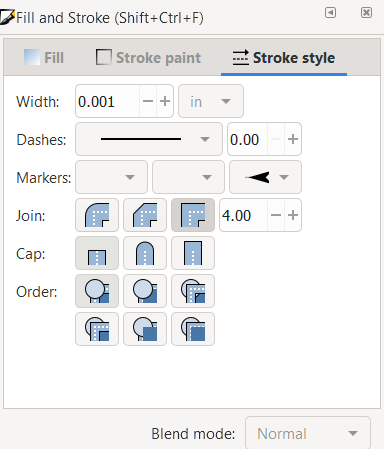
Before saving your file, you must keep in mind which vectors you would like to be cut, and which ones you wish to be engraved. Lines that are meant to be cut must be defined at a stroke width of 0.001 inches. Using the Fill and Stroke menu, ensure that the lines wished to be cut are at the correct width and are solid in opacity and black in colour. You’ll notice that these strokes may become difficult to see, so it is recommended to save this step for the very end.
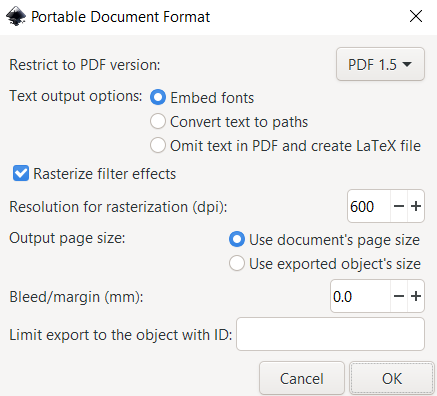
When you are ready to save your file for the laser cutter, click File>Save As, name your file something recognizable and select the file type as PDF. Another menu labeled “Portable Document File” will pop up, if you’re unsure what to set your Rasterization dpi to, set it to 600 and then hit Ok. You are now ready to bring the PDF design to the laser cutter!

